Upcoming Head Gasket replacement

kleake

Member
Joined
Jul 6, 2016
Messages
430
Reaction score
1
Location
Sapulpa, OK
Rocker spacer is correct, even if it wasn't it wouldn't be allowing the rockers to pull down too close to the head causing this, it would actually push the opposite and make them loose.

When I moved the rockers to other cyl I wasn't completely accurate for 2 reasons. 1. the amount of compression did change, but only a slight amount. 2. When I said that the previously good cyl now had 0 compression, after it sat overnight that compression did come up to about 200. The reason for this is the lifter had time to compress and get all of it's oil out. I realized this on some of the others too so I redid my test. Torque the rockers down, bump it over until the cam is opening a valve, let it sit for about 30 seconds, then do the other valve. Compression then comes up as far as it's going to go. So in the end, the issue was still present in all cyl, however some worse than others.

6.0 Tech, I agree with you when you are measuring for spring installed height, but i'm not 100% sure when it comes to stem height. I know I have read a couple of places that say to measure from the OEM casting without any shims, but I don't know if the stem seal in this case qualifies as a "shim" or the OEM spring surface.
 

03svtcobra

New member
Joined
Feb 13, 2013
Messages
10
Reaction score
0
Location
Missouri
I would go back to the dealer you bought the heads from and then find out who remanufactured the heads. Once you get that, call them and get the specs and procedure to measure, specifically with or without seal.
 

kleake

Member
Joined
Jul 6, 2016
Messages
430
Reaction score
1
Location
Sapulpa, OK
I spoke with 2 machine shops this morning and both confirmed that you always measure valve stem height from the casting to the tip because the thickness of that ring on the valve stem seal can vary in thickness by .010-.015 not to mention how much it's own thickness changes that height.
 

kleake

Member
Joined
Jul 6, 2016
Messages
430
Reaction score
1
Location
Sapulpa, OK
On the road again! Woohoo!!! Got her back together and it took a little bit to get the air out of the fuel lines again, but she fired up nice and smooth. The valvetrain is quieter than it's ever been! Only issue I had is one of the lines on the HPFP was leaking and dripping on the ground. Had to pull the down pipe to get to it, but snugged it up about an 1/8th of a turn and she quit. It was a little slow starting each time until I put a few miles on it, but all is good now. Finished putting the bumper back on and finishing up one cab bolt that wanted to spin the nut on the top side but finished that up this evening. Exhaust sound GREAT!!! Not loud, but a great tone just off idle. It does get that loud tone when it gets to the right rpm, but not annoying. Haven't really tested performance yet, just wanted to make sure all ran good.

THANK YOU everyone that chimed in with helpful comments, it definitely helped me brainstorm the issues and look for solutions. Glad to finally have her back on the road! I'll get some pics tomorrow after she gets a bath.
 

webb06

Active member
Joined
Aug 14, 2012
Messages
3,888
Reaction score
9
Location
Seneca, MO
So did you end up just taking a small amount of material off of each rocker bridge?


Sent from my iPhone using Tapatalk
 

kleake

Member
Joined
Jul 6, 2016
Messages
430
Reaction score
1
Location
Sapulpa, OK
So did you end up just taking a small amount of material off of each rocker bridge?


Sent from my iPhone using Tapatalk
Yes, I took off between .015-.020 off the top of each bridge. Made sure each rocker had at least a little slack so the lifter isn't completely bottomed out.

Sent from my SM-G935R4 using Tapatalk
 

kleake

Member
Joined
Jul 6, 2016
Messages
430
Reaction score
1
Location
Sapulpa, OK
Total bill is $8992 which includes:

Heads
Gasket set
HPFP
Injectors
Rocker arms
Lifters
Front cover
Radiator hose
EGT sensor
HPFP fuel lines
A/C evap/recharge
ARP studs
BD manifold/up pipes
Flo-Pro dual exhaust
Fluids (oil, antifreeze, PS fluid, trans fluid top off)
Oil and fuel filters
A few other things i'm sure i'm forgetting.

If I was "only" repairing the head gaskets, I could have gotten away with a gasket set, studs, and heads since mine were cracked. All else was preventative and/or upgrades.
 

burtco99

New member
Joined
Mar 17, 2015
Messages
3
Reaction score
0
I recently experienced similar issues on my own truck. during research, I discovered the following:

- Installing 6.0 bridges on a 6.4 -- 6.0 bridges are a bit taller.
- Installing 6.0 valves in a 6.4 head. 6.0 valves are a bit longer.
- Machining too much off the head results in the lifter being compressed further.
- Cutting the valve seats too deep ,and compensating with valve spring shims.
- New rocker arm pedestals that are shorter than the originals.

any of the above errors can result in the valves not closing completely due to the lifter being bottomed out.

My own truck suffered the 6.0 bridge mix-up. I accidentally ordered the wrong parts when preparing for a rocker arm replacement. Scratched my head for some time before figuring out the problem.

I also discovered that replacement FORD rocker pedestals are not made to the same tight specs as the originals, one set I purchased was 0.018" shorter, while the other set was tapered end to end by 0.010" and was 0.010" shorter. The shorter pedestal will push the lifter plunger further into the lifter, possibly bottoming it out. Since the rocker pedestals are a non-wear item, I recommend you compare originals to the new replacements prior to installing them.
 

kleake

Member
Joined
Jul 6, 2016
Messages
430
Reaction score
1
Location
Sapulpa, OK
I thought about the pedestals and measured them. They were the same as my originals, but I questioned the mounting surface in the heads too. I didn't know there was that much difference in the components between a 6.0 and 6.4.

Sent from my SM-G935R4 using Tapatalk
 

kleake

Member
Joined
Jul 6, 2016
Messages
430
Reaction score
1
Location
Sapulpa, OK
Just wanted to give a little update. All is running great, no issues. Truck does seem to be a little stronger, but not a large amount. The only true performance upgrades were the BD manifold kit and exhaust so I wasn't expecting much. I can however see a HUGE difference there.

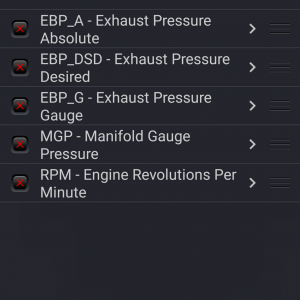
Exhaust back pressure used to be almost double boost pressure, now it's only 5-8psi higher than boost pressure, even at WOT! Exhaust temps seem to be a little lower as well, but i'll know for sure once I hook to my camper in another week or so. Turbo also seems to spool up faster and the exhaust tone is MUCH better.

Evidently I broke the PCV line during all my work because I have a decent oil leak coming from where it bolts to the front of the block on the passenger side. I'm not sure how hard it will be to fish a new one in there, so it may be easier to splice it. I'll see once I have a moment to repair that. Pretty minor issue other than the mess.

Feels good to be able to get on the floor with the throttle and not worry about spewing antifreeze down the drivers side engine bay. :D
 

Lipka101

New member
Joined
Feb 2, 2014
Messages
586
Reaction score
0
Location
Maryland
Just wanted to give a little update. All is running great, no issues. Truck does seem to be a little stronger, but not a large amount. The only true performance upgrades were the BD manifold kit and exhaust so I wasn't expecting much. I can however see a HUGE difference there.

Exhaust back pressure used to be almost double boost pressure, now it's only 5-8psi higher than boost pressure, even at WOT! Exhaust temps seem to be a little lower as well, but i'll know for sure once I hook to my camper in another week or so. Turbo also seems to spool up faster and the exhaust tone is MUCH better.

Evidently I broke the PCV line during all my work because I have a decent oil leak coming from where it bolts to the front of the block on the passenger side. I'm not sure how hard it will be to fish a new one in there, so it may be easier to splice it. I'll see once I have a moment to repair that. Pretty minor issue other than the mess.

I broke the same line when I did mine. Just spliced it with a piece of hose.


Feels good to be able to get on the floor with the throttle and not worry about spewing antifreeze down the drivers side engine bay. :D

This ^^^ such a good feeling.

Sent from my SAMSUNG-SM-G890A using Tapatalk
 

6.4f350

New member
Joined
Mar 11, 2015
Messages
208
Reaction score
0
Just wanted to give a little update. All is running great, no issues. Truck does seem to be a little stronger, but not a large amount. The only true performance upgrades were the BD manifold kit and exhaust so I wasn't expecting much. I can however see a HUGE difference there.

Exhaust back pressure used to be almost double boost pressure, now it's only 5-8psi higher than boost pressure, even at WOT! Exhaust temps seem to be a little lower as well, but i'll know for sure once I hook to my camper in another week or so. Turbo also seems to spool up faster and the exhaust tone is MUCH better.

Evidently I broke the PCV line during all my work because I have a decent oil leak coming from where it bolts to the front of the block on the passenger side. I'm not sure how hard it will be to fish a new one in there, so it may be easier to splice it. I'll see once I have a moment to repair that. Pretty minor issue other than the mess.

Feels good to be able to get on the floor with the throttle and not worry about spewing antifreeze down the drivers side engine bay. :D

That line runs down behind the alternator bracket, it would be a pain to change out. I just replaced mine with a rubber line and ran it from the can to the bed plate.
 

kleake

Member
Joined
Jul 6, 2016
Messages
430
Reaction score
1
Location
Sapulpa, OK
That's what I was worried about. I can see the spot it's broke while looking up from the bottom, but it may be tight to get my hands in there. I should have time tonight to take care of it. I'm hoping to slide a short piece of hose on there to splice the two ends together but we'll see. I may end up with a simple rubber hose.
 

kleake

Member
Joined
Jul 6, 2016
Messages
430
Reaction score
1
Location
Sapulpa, OK
I was able to slide a piece of 3/8 hose over a screwdriver, stab the screwdriver into the upper end of the line and then push the hose onto the line. Got it pushed on by about 2" or so, then pushed the lower line on the bottom of the hose. It was a fairly snug fit so it should stay. It is definitely tight in behind those alternators.
 

kleake

Member
Joined
Jul 6, 2016
Messages
430
Reaction score
1
Location
Sapulpa, OK
Well guys, bad news..... About 10k miles on the new heads and they started leaking just like before. Get over about 22-25psi boost and it starts pressurizing the coolant. I've been babying it for about 2-3k and just pulled the heads again trying to figure out what went wrong. The only thing I can think of is either my torque was out of spec, or the studs stretched after a few heat cycles. To try and verify, I marked one head bolt, then re-torqued with my torque wrench and a new torque adapter (both are within 2lbs of each other at 250). I was able to turn the stud approximately 1/4 turn farther than where it was. So, i'm thinking new gaskets, re-torque and all should be ok.

However, when I pull the heads, I find something I did not expect.

20170325_210626_zpsgd7sawak.jpg

20170325_210619_zpswugiiplt.jpg

20170325_210741_zps67bspnte.jpg

20170325_210732_zpsjoidyqkz.jpg


Yep, the valves hit the pistons...... If you remember from previous, I had issues with the head from Ford and I had to modify the valve bridges because of incorrect valve stem height. The front and rear cylinders were the tightest tolerance and holding those valves open the most so I had to shave the most from those valve bridges. The front and rear pistons are the ones with the valve marks on them.

Now, I don't believe they have been hitting after I corrected the issue since the marks are not shiny or worn, it just looks like they hit once when I first cranked it over, so I am pretty confident the problem has been solved when I modified the valve bridges. However, the one mark on the rear piston is fairly deep. Could this cause a future crack in the piston, or could it have caused other issues like compressing a rod bearing, or putting an indention on the cam?

I'm not sure if I should slap it back together with new gaskets, make sure the torque is right, and run it, or if I should go back to Ford and see what they are willing to do since it was their faulty heads that caused the problem in the first place. At this point, i'm just not sure Ford would do anything about it at all really. The truck has been running strong with no issues other than the gaskets starting to let go again around 10k miles. I've only pulled one head so far. I'm afraid Ford may just want to send me new heads, which is fine, except now I have modified my valve bridges as well so I would need those also. I'm also not sure if I want to mess with the time/shipping and all of that again too, and that isn't going to fix the pistons anyway.

Thoughts?
 

kleake

Member
Joined
Jul 6, 2016
Messages
430
Reaction score
1
Location
Sapulpa, OK
Replace any valves that hit.

Based on the way the valves are pretty flat in relation to the pistons, I don't think it bent any valves. I've done compression checks on all of the cyl and they are all very close to each other. I'm mostly concerned about piston life and bearing life.

Also, after further inspection I also found 2 bent pushrods. Front and rear cyl on the driver side. I'll be pulling the passenger side apart next and expect to find the same thing.

20170326_213308_zpsiqzizgsv.jpg
 
Top