TrickTruck
Member
It's not the first mod the truck got, that was the Truetrac, but up second is the suspension - and it needs it too.
I worked with Casey over at SoCal Supertrucks and they were great configuring and ordering a custom suspension for me.
We ended up leveling the truck with Icon springs and the TEI spacer and mixed in the King Piggyback shocks (at $500 a pop!) Also added the Icon adjustable track bar.
I have high hopes.
The King shocks are custom built, so I've been waiting a while and it showed up at about noon on the 3rd.

At first I was thinking: "let's just get it out of the package."
Then I'm looking at that little pile and thought: "install just the shocks."

Whew, expensive little pile.
So I got to work. But quickly realized, I was going to install the whole thing.
Dissassembly was very straight forward. Brake lines seemed pretty short, so I disconnected the bracket for now.
TEI Spacer


Stock vs Icon Leveling springs

Second issue I ran into was the large ring on the bottom of the king front shocks hits the shock mount. Decisions decisions, cut the truck or cut the shock. In the end I decided on the shock because that washer is just not structural and the bracket is.


At full droop the brake lines are too short. I drilled and tapped the frame (that was fun let me tell you) and relocated the brackets down a bit. I'll be looking for some Stainless Steel Lines in the near future.
The track rod came with no instructions, I asked Icon what length to set it at and they said 'stock'. Stock is just right to drive the passenger spring into the bump stop and make bad noises. I ended up with 3 turns out on the track rod and 5.25 out on the drag link gets the steering wheel pretty centered. An alignment shop will do better.
The rest of the install went pretty easily. The King piggybacks are a pain to get in there where they fit, but it can be done. I think I'd like to relocate the reservoirs to the frame if I can find some nice brackets.
I am having a problem with the tie rod hitting the sway bar links at full droop. I'll have to find some longer ones somewhere.

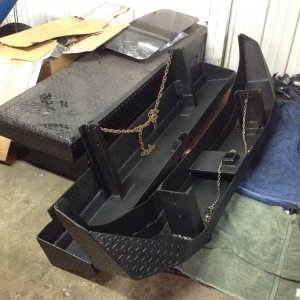
Here's the leftover parts, somehow I don't think Ford spent $4000 on this stuff.

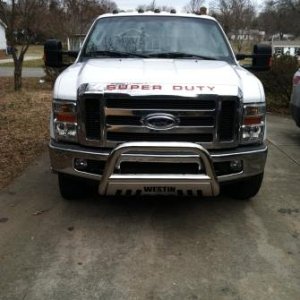
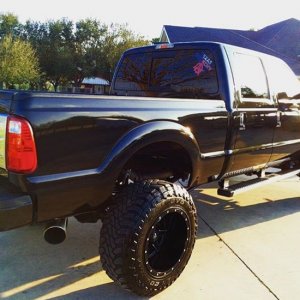
Before

After

There is a noticeable increase in the height getting in and out of the cab.")
According to my level, it's at a slight nose down attitude now.
Driving it, well, it's still a 1 ton truck, not much we are going to do about that, but it's smoother and flatter in the corners. Rides nicely.


Install time is a bit hard to estimate, I was dealing with a pool crisis during the day, it was hotter than blazes so I took a few 'breaks' for a 'beverage'. I started at 1p, took the first test drive around 8p. Still need to shanghai the GF to help me set the alignment.
I worked with Casey over at SoCal Supertrucks and they were great configuring and ordering a custom suspension for me.
We ended up leveling the truck with Icon springs and the TEI spacer and mixed in the King Piggyback shocks (at $500 a pop!) Also added the Icon adjustable track bar.
I have high hopes.
The King shocks are custom built, so I've been waiting a while and it showed up at about noon on the 3rd.
At first I was thinking: "let's just get it out of the package."
Then I'm looking at that little pile and thought: "install just the shocks."
Whew, expensive little pile.
So I got to work. But quickly realized, I was going to install the whole thing.
Dissassembly was very straight forward. Brake lines seemed pretty short, so I disconnected the bracket for now.
TEI Spacer
Stock vs Icon Leveling springs
Second issue I ran into was the large ring on the bottom of the king front shocks hits the shock mount. Decisions decisions, cut the truck or cut the shock. In the end I decided on the shock because that washer is just not structural and the bracket is.
At full droop the brake lines are too short. I drilled and tapped the frame (that was fun let me tell you) and relocated the brackets down a bit. I'll be looking for some Stainless Steel Lines in the near future.
The track rod came with no instructions, I asked Icon what length to set it at and they said 'stock'. Stock is just right to drive the passenger spring into the bump stop and make bad noises. I ended up with 3 turns out on the track rod and 5.25 out on the drag link gets the steering wheel pretty centered. An alignment shop will do better.
The rest of the install went pretty easily. The King piggybacks are a pain to get in there where they fit, but it can be done. I think I'd like to relocate the reservoirs to the frame if I can find some nice brackets.
I am having a problem with the tie rod hitting the sway bar links at full droop. I'll have to find some longer ones somewhere.
Here's the leftover parts, somehow I don't think Ford spent $4000 on this stuff.
Before
After
There is a noticeable increase in the height getting in and out of the cab.
According to my level, it's at a slight nose down attitude now.
Driving it, well, it's still a 1 ton truck, not much we are going to do about that, but it's smoother and flatter in the corners. Rides nicely.
Install time is a bit hard to estimate, I was dealing with a pool crisis during the day, it was hotter than blazes so I took a few 'breaks' for a 'beverage'. I started at 1p, took the first test drive around 8p. Still need to shanghai the GF to help me set the alignment.