You are using an out of date browser. It may not display this or other websites correctly.
You should upgrade or use an alternative browser.
You should upgrade or use an alternative browser.
2014 Sema project
- Thread starter jordan572
- Start date
Okay off the interior for a little while, back at those wilwoods. I still can't get over the massive 16'' rotors. Like mentioned before if anyone wants these things Todd at TCE performance is the only way to go. Full blown kit with instructions and every nut and bolt needed, plus the after purchase support and knowledge is always great.
Anyway I knew there was some fitting to do with this kit, this was stated up front. You know the rotors are huge when they stick out past the dust shield about an inch, that took some good trimming and fitting. The iron mounting holes for the caliper also need to be shaped to allow room for the TCE machined radial bracket. It makes a lot more sense to trim the iron slightly than to sacrifice a lot of strength by making the aluminum bracket drop in. I'm sure this all can be done quickly, but first time and trying to make it as clean as possible takes time.


The big lip before,

After some cutting wheel and grinding action,


These front ones seemed to drop right in which was cool, not claiming this though until everything is said and done,

Anyway I knew there was some fitting to do with this kit, this was stated up front. You know the rotors are huge when they stick out past the dust shield about an inch, that took some good trimming and fitting. The iron mounting holes for the caliper also need to be shaped to allow room for the TCE machined radial bracket. It makes a lot more sense to trim the iron slightly than to sacrifice a lot of strength by making the aluminum bracket drop in. I'm sure this all can be done quickly, but first time and trying to make it as clean as possible takes time.
The big lip before,
After some cutting wheel and grinding action,
These front ones seemed to drop right in which was cool, not claiming this though until everything is said and done,
Trucks coming along awesome. What did you do to prep all the chrome before paint. I am wanting to paint my fender trim and platinum letters but my painter said he didn't know how to get the paint to stick?
Obviously painting chrome is never ideal but for emblems and stuff where you have to we just hit it with a scotch pad. Rarely have problems much with chipping, never on side emblems, etc. On some of the chrome red scotch pads are too course and you have to resort to yellow. Just get in there real good and take your time, not much else you can do imo.
uga33
New member
Unbelievable man. So sweet!
Chris.v
Member
- Joined
- Dec 24, 2012
- Messages
- 198
- Reaction score
- 0
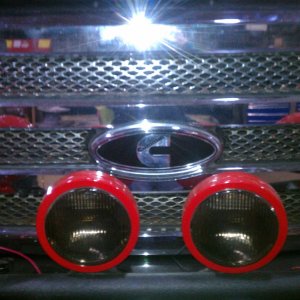
For the fender badges, the chrome ring around the f350, does it separate from the black part??
For the fender badges, the chrome ring around the f350, does it separate from the black part??
Yes it can be taken apart carefully. There are little clips that hold it together.
LovinPSDs
New member
Man those Wilwood's are SICK. Besides the functionality of them, I think badass brakes hiding behind a wheel REALLY stands out. Funny to see things like an escalade or something with 26s and those little tiny disk or drums inside. Seriously awesome build and those huge calipers are going to look PURTY in there.
Man those Wilwood's are SICK. Besides the functionality of them, I think badass brakes hiding behind a wheel REALLY stands out. Funny to see things like an escalade or something with 26s and those little tiny disk or drums inside. Seriously awesome build and those huge calipers are going to look PURTY in there.
I agree, planning to give the wilwoods some red color.
For the fender badges, the chrome ring around the f350, does it separate from the black part??
Yes, like mentioned, be very careful, the tabs on the 3 especially you have to be very careful with.
Chris.v
Member
- Joined
- Dec 24, 2012
- Messages
- 198
- Reaction score
- 0
Crazy. I had mine all apart and couldn't figure out how to separate them. Justvwound up vinyl wrapping inside the letters
bricewise
New member
- Joined
- Mar 9, 2013
- Messages
- 937
- Reaction score
- 0
Those wilwoods are sick.
Crazy. I had mine all apart and couldn't figure out how to separate them. Justvwound up vinyl wrapping inside the letters
Sometime between 12 and 13 they made a change, the 12's emblems are all molded and don't come apart for paint like the 13 up emblems do.
Dmstrucks02
New member
Wow the paint work is crazy, looks amazing!
millermwd
New member
- Joined
- Jul 6, 2014
- Messages
- 43
- Reaction score
- 0
Obviously painting chrome is never ideal but for emblems and stuff where you have to we just hit it with a scotch pad. Rarely have problems much with chipping, never on side emblems, etc. On some of the chrome red scotch pads are too course and you have to resort to yellow. Just get in there real good and take your time, not much else you can do imo.
How did you mount your mini maxx is there a bracket you made or purchased from somewhere looking to put mine in a place for good like yours jordan
Crack85
Active member
I'm going to guess like everything else on this truck that was custom.
millermwd
New member
- Joined
- Jul 6, 2014
- Messages
- 43
- Reaction score
- 0
Wouldn't doubt it haha
Lol, a little bit of both. I used the raised mount pod adapter from H&S, basically eye balled a good spot and got the hole saw out. After that I had to dremel the honeycomb reinforcement off the back side to allow the adapter to sit flush with the trim piece. Glued it up and away I went, obviously a little more goofing around than it seems but it worked.
millermwd
New member
- Joined
- Jul 6, 2014
- Messages
- 43
- Reaction score
- 0
The mount adapter just clips to the back of it and then cut it out on the dash part and glue it around from behind?
I pulled the trigger on a little bit of an audio upgrade for the truck, honestly the 13+ system is miles better than the 12- I have heard. But still it is no where near a quality aftermarket system. I'll say it right now, I am not a professional audio installer. Everything went we'll so far and there has been no surprises yet but the installation in newer vehicles with multi speaker systems is becoming rather complex.
I decided to drop in a full JL system, I've always liked their products and they had a lot of drop in options for this truck. I'll be running C5 components in the front and rear along with the JL stealthbox with a 13tw5. An HD900/5 amp will be used to power everything, these hd amps are such an upgrade from the older slash series. So small and compact, they easily fit under the seat. I chose to use cleansweep products to clean up the factory signal for a few reasons, one the processor sets up itself. I don't have the proper tools or knowledge to tune one. It was also nice to have all JL products, the processor and summing interface were meant to work together so it makes things more manageable.


I decided to drop in a full JL system, I've always liked their products and they had a lot of drop in options for this truck. I'll be running C5 components in the front and rear along with the JL stealthbox with a 13tw5. An HD900/5 amp will be used to power everything, these hd amps are such an upgrade from the older slash series. So small and compact, they easily fit under the seat. I chose to use cleansweep products to clean up the factory signal for a few reasons, one the processor sets up itself. I don't have the proper tools or knowledge to tune one. It was also nice to have all JL products, the processor and summing interface were meant to work together so it makes things more manageable.
The mount adapter just clips to the back of it and then cut it out on the dash part and glue it around from behind?
Yea, glue just the back side. It'll make more sense when you get in there.