Midnite Brawler Build

sootie

Well-known member
Joined
Oct 3, 2012
Messages
11,843
Reaction score
35
Saw that its "topless" today. Glad to see ya gettin it done


I wanted that turbo. :poke: lol

hey-no one said that turbo is staying in there LOL

.....it all depends what else comes along....
 

Spatel23

Moderator
Joined
May 18, 2011
Messages
6,010
Reaction score
0
Location
Olive Branch, MS
Thanks Shone-that's exactly what i was wondering. as soon as the cab is back down and the truck is mobile i will flip them. i guess i got thrown off by the instructions...

no problem
yeah, fabtech really needs to rewrite/amend those instructions
 

B585Ford

New member
Joined
Mar 17, 2012
Messages
2,730
Reaction score
0
Location
WV
Haller is definitely suppose to be one of the best WG guys out there so I always pay real close attention when he posts. A long time ago he posted that he would prefer the WG open in the low 60s because you won't get much more power out of it going higher and you will be putting more strain on the valve train goin higher. Opinions on optimal Opening do vary. I am not sure which spring it will take, but that is where I will be setting mine.
 

sootie

Well-known member
Joined
Oct 3, 2012
Messages
11,843
Reaction score
35
cab is on its way back down.......

learning curve setting up the wastegate and a challenge to fit the custom downpipe and upipes.
 

sootie

Well-known member
Joined
Oct 3, 2012
Messages
11,843
Reaction score
35
the truck is running. egts are stupid cool-rolling into it from 60+ mph it will hardly break 1100
just getting used to the sound of the different turbo and the truck feels pretty strong.

i got the traction bars flipped over last nite so hopefully they wont hit the springs now_i will hook up to the trailer here in a little bit to check.

got the Gearhead tuning installed as well but i need a few more miles to get the trans learned properly.

im quite pleased overall
 

sootie

Well-known member
Joined
Oct 3, 2012
Messages
11,843
Reaction score
35
here are some pics
 

Attachments

  • IMG-20130627-00339.jpg
    IMG-20130627-00339.jpg
    779.2 KB · Views: 179
  • IMG-20130627-00342.jpg
    IMG-20130627-00342.jpg
    716.6 KB · Views: 151
  • IMG-20130627-00344.jpg
    IMG-20130627-00344.jpg
    614.3 KB · Views: 147

sootie

Well-known member
Joined
Oct 3, 2012
Messages
11,843
Reaction score
35
Thanks guys!!


i have put about 500 miles on the setup and really like it. only a couple of things i wish were were better....

one is the fact that if i am doing between 60-75 mph and step on it, the trans shifts to fourth and wont lock the tc.

second thing is the trans pukes fluid out the breather when it gets warm and has made a mess of the interlock driveway. it was overfull so i drained some out but it still does it. trans never gets hotter than 190 and shifts fine-relearn is done-running Matt's tunes. it puts out enough to spatter all over the bottom of the truck. anyone seen this before?
 

89xj

Member
Joined
May 18, 2011
Messages
358
Reaction score
0
Location
Milton ontario
Mine did that right after it was built on a trip to Kingston and back. It was also around 190. It covered the tailgate and trailer.after that it was completely fine. Had them check it and everything was normal.
 

sootie

Well-known member
Joined
Oct 3, 2012
Messages
11,843
Reaction score
35
well.....i have been driving this truck constantly and cant get away from the trans leak. it seems to be forcing it out around the pan gasket too. it is much worse after a hard highway run and temps over 180.
 

Spatel23

Moderator
Joined
May 18, 2011
Messages
6,010
Reaction score
0
Location
Olive Branch, MS
I thought my trans was overfilled once upon a time and it turned out that the ARP oring for my Maghytec pan was bad.

Just a thought if you are sure it is not overfilled and you do in fact have the deep pan.
 

sootie

Well-known member
Joined
Oct 3, 2012
Messages
11,843
Reaction score
35
I thought my trans was overfilled once upon a time and it turned out that the ARP oring for my Maghytec pan was bad.

Just a thought if you are sure it is not overfilled and you do in fact have the deep pan.
i have the stock pan and i made sure all the pan bolts were tight. the level showing on the dipstick is below the hot full mark.
 

Bustedknuckles

Active member
Joined
Aug 15, 2011
Messages
1,503
Reaction score
0
i have the stock pan and i made sure all the pan bolts were tight. the level showing on the dipstick is below the hot full mark.

You have a junk gasket, or it wasn't tightened right, start in the middle and go from side to side working you way to the edge. Torque them to spec and use a hard rubber gasket, not the junk that comes with a cheap filter kit. If it still leaks its coming from somewhere else.
 

BFT

Moderator
Joined
May 18, 2011
Messages
2,628
Reaction score
0
Location
southern cali
Another thing to check is the sleeve where your tranny dip stick goes into. I had a leak and thought it was the seal and turned out to be that
 

sootie

Well-known member
Joined
Oct 3, 2012
Messages
11,843
Reaction score
35
stupid trans now does a big rev slam on the 3-4 shift at anything over 50% throttle. after all the money i spent on this thing i thought i could at least nurse the trans longer than 2 weeks.
 

sootie

Well-known member
Joined
Oct 3, 2012
Messages
11,843
Reaction score
35
i swapped the dd solenoid out for the stock one and got a revised trans tune from Matt-the shifting issues went away however it still runs hot and pukes fluid. i think maybe the solenoid might have got dropped during shipping or something-I'm not sure what would cause it to malfunction.


just driving along today and got a CEL P2263 Turbo not performing or something like that. i don't see any differences with the truck but if i clear the code it comes back in a couple of miles. i had another code (exhaust sensor something) but i couldnt see the code number before it went away. it still reading boost, ebp and egt

any ideas?
 

sootie

Well-known member
Joined
Oct 3, 2012
Messages
11,843
Reaction score
35
73mm Atmo turbo install, cab on

i hadn't updated this in a while but i am pleased to be working with James @ Barder Turbo and testing his new 73mm drop in atmo charger! This unit has an aggressive billet wheel and 360* thrust bearing on it.
The bearing on my 71mm gave out so i thought i would give this a try. Shortly after i got it installed, i had coolant getting into the crankcase so the truck has been parked for a bit.
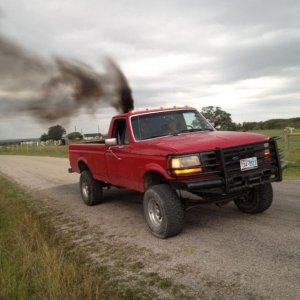
the time i did get to drive it was awesome tho! LOL spool up is only a hair slower than stock but i noticed lower back pressure than with my other turbo. it pulls real strong (the trans slipped the first time i rolled into it so i kno its making more power than before). Cleans up pretty much all the fuel that i have with Matt's race tune-barely a haze comes out of the pipe. i was having too much fun to do a mileage test but that will come-alone with some dyno time.

Best part about the whole deal is getting to work with James, stand up guy, always answers his phone, fast turnaround time and always a pleasure to speak to.

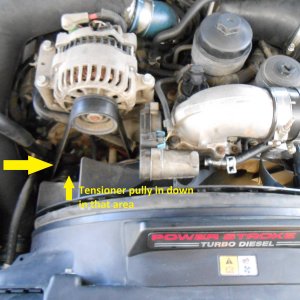
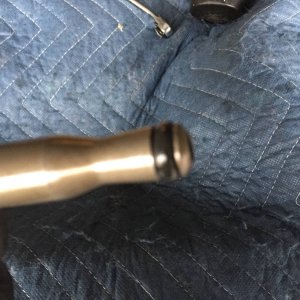
Here are some pics of the cab-on install.....put it this way, my forearms and hands hurt.

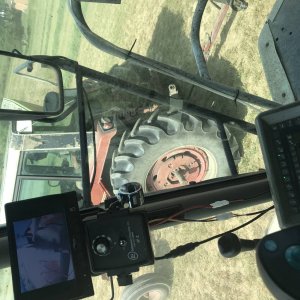
First pic...the absence of a topside creeper........forklift and plywood FTW!

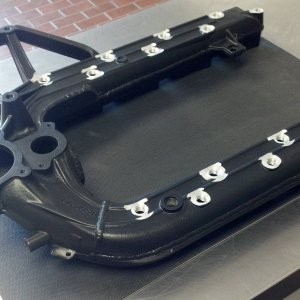
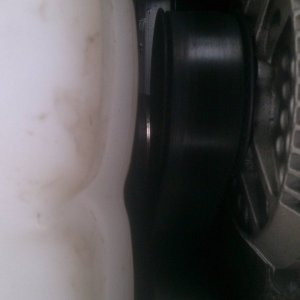
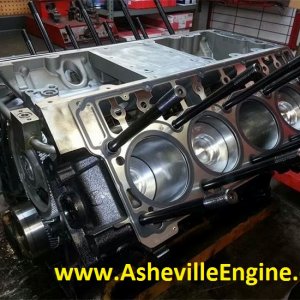
The other pics are showing what all has to be removed for a cab-on install as well as what the new turbo looks like tucked in there.

For anyone that is wants to attempt a cap on atmo turbo swap, here is the process:

Disconnect both ground clamps from the batteries, remove air intake, remove the heat shield that covers the turbos, remove oil feed to turbos, unbolt vgt actuator from turbo housing, remove black fuel cooler bracket from over top of drivers side valve cover, (with it will come the u-bend boost tube) undo the two fuel line banjo bolts that go to the top of the fuel cooler, swing the whole shootin match overtop of the drivers battery. using a 3/8" swivel head ratchet, undo the six bolts that hold the uppipes to the exhaust housing. (if you have 6.0 manifolds it is easier to just unbolt the upipes from the manifold via the inner fender, i learned this in retrospect) Now take out the two big bolts down between the lp & hp charger that hold the turbos to the engine. now that everything is out of the way, i used a prybar from each side between the exhaust housing and the rocker box DO NOT PUT TOO MUCH FORCE ON ANYTHING it is strictly to "rock" the turbos slightly to get them elevated off the alignment dowels which are tapered. once the pair of turbos comes up slightly you will be able tip them to the drivers side slightly and the atmo charger will lift up and out on an angle towards the passenger side. Tada!!

the hardest part of the whole job is the uppipe bolts. This took me from dawn to dusk but now that i have done it once, the next time will be much easier.
 

Attachments

  • IMG-20130908-00701.jpg
    IMG-20130908-00701.jpg
    169.6 KB · Views: 260
  • IMG-20130908-00703.jpg
    IMG-20130908-00703.jpg
    175.9 KB · Views: 263
Last edited:
Joined
Oct 1, 2012
Messages
5,868
Reaction score
0
Location
Athens, IL
Just a little bump to the top. As sootie has mentioned he has had antifreeze in his crankcase. He contacted use and picked my brain about the experiences we have had with cracked blocks of the same nature. The talks ended up with the engine being pulled and shipped down to us.

The agreement was made in a list of parts and pricing to do the build. Also agreed upon was that we will not perform anything until the leak was positively confirmed. Here's what's we found after some disassembly and pressure check. The pic is not perfect but you can see the rust line in the block. It had plenty of bubbles when pressurized to 40psi.

u3u5ysy8.jpg

u4esy7ed.jpg

The crack is exactly where the majority of them split. In the second head bolt in from the end in the lifter valley.

And some pics for sootie since I don't think the engine showed up yet. He may be antsy to see it.

ha8a6y4e.jpg


dyquneby.jpg


urebupam.jpg


We did a full new block, HD pistons, HD springs, HD pushrods, new lifters, new oil cooler, new studs and oem gaskets, all new seals bearings and gaskets.

Get ready to have some fun with that new engine!
 

Latest posts

Members online

Top