The Grand Pooh-Bah
New member
1999 - 2004 F250 F350 to 05-07 Morimoto D2S 5.0 55W Projector Conversion/Upgrade

When I started this project I was not able to find very much information on what to expect or how to accomplish my desired outcome. I live and travel on roads that sometimes have more wildlife activity than human interaction in northern Idaho. I needed substantially more light than the stock headlights offered in order to give me a fighting chance to react to deer, elk or moose crossing the road at night.
I want to share my successes and failures in this project to help save you from some of the frustrations and added expenditures I encountered.
Before I started this project I already tried high end LED bubs and upgraded clear headlight lens. These upgrades provided less than stellar improvements in light where I needed it most, on the sides of the road and down the road to see the reflections of critters eyes.
After substantial research and personal preference I decided to upgrade my 2001 F250 to the one piece headlight/ parking/turn signal assembly of the 2005-2007 F250/F350. This part of the upgrade can be accomplished by following the well explained instructions provided by Riffraff Diesel Performance 99-04 Superduty to 05 Headlight Conversion
First Mistake: In my infinite wisdom and desire for quality I decide to purchase a set of 2005 Ford OEM Headlight assemblies. Ford is using an adhesive to join the lens to the body that is not favorable with oven disassembly. This cost me $140 and one headlight assembly.
 Harley Style 05-07 Headlight Assembly
I chose a 05-07 aftermarket set with clear reflectors and black inner housing. These are available on Amazon and eBay. These are the actual headlights for 05-07 not the ones for 99-04 that look like 05-07.
In order to install projectors, halos, LED light strips or anything else inside your headlight assemblies you must first gain access to the insides.
 Remove the corner screw
Remove the bulbs (if provided), rubber bulb seal, any protective film and the only screw in the corner of the assembly. *Don’t forget to remove this screw*.
Remove all the oven racks except one, which you will put on the lowest rung. Preheat your oven to 240°F.
 Set Oven at 240°F
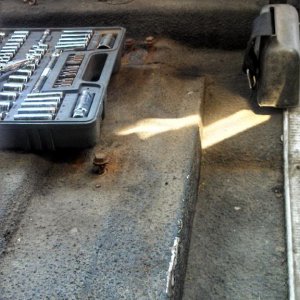
Prepare a working area with a clean old towel or two. You will also need several clean microfiber towels to remove any adhesive that gets on your lens during disassembly. It is easier to remove this adhesive while it is still warm. You will also need some gloves, narrow flathead screwdriver, short wide blade screwdriver, mini crowbar.
 Prepared Work Area
When oven is ready put one assembly in the oven quickly so the heat doesn’t escape. Set the timer for 20 minutes. When time is up put on the gloves and carefully remove the lens and take it to your prepared work area.
 Start in this corner
Starting in the corner where the clear lens protrudes from the housing body, push the tabs back on the outer edges of the lens. Use the wide blade screwdriver to separate the lens from the body while releasing the tabs as you go around.
You will notice that one edge does not have tabs. This side is held in with a lip. When all of the tabs are released and the lens is lifted away from the body on three sides you will pull the lens out from under the lip. Use something to catch the stringy adhesive as you pull the lens away. You don’t want it on your lens or the inside of the body. This can be messy. Clean any adhesive off the outside of the lens with your microfiber towels. Do not touch the inside of the lens, they do not have a protective coating and will show scratches, even from a microfiber towel.
Set the lens inside a plastic garbage bag on a soft clean surface away from your work area.
Now take your narrow blade screwdriver and smooth out the warm adhesive in the channel where the lens mates with the body. This will help make a better seal when you reassemble.
 Remove the other three screws
Now remove the other three screws from the body and the turn signal reflector will come out. Put this in a plastic bag and set aside if you are not going to modify or paint.
Second Mistake: When removing the headlight reflector from the body, be sure that all of the pressure is on the black plastic retainer. If you put pressure on the reflector tabs that hold the black plastic retainer, the tabs will break and you will have a broken reflector.
 Make sure edge of mini crowbar is on plastic insert

Release both black plastic retainers on the headlight reflector straight up off the pins with pressure from the bottom. Then pull the lens off the upper corner adjusting pin with your hands. It comes straight out from the body.
Your headlight disassembly is now complete and ready for modifications.
Sorry if this seems long winded but these fine details can make the difference between success and failure. Once you pull the assembly out of the oven you need to have your ducks lined up and ready, in your limited window before the lens cools down.
Preparing the Host Headlight Reflector
This is where your Dremel tool becomes your friend.
Objectives:
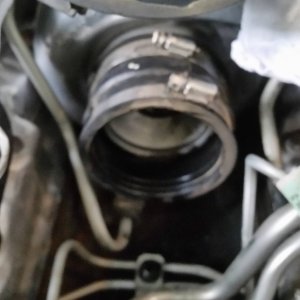
• Open up the inside diameter of the bulb socket to accommodate the Morimoto projector.
• Smooth out the ridges on the inside of the reflector around the bulb opening for the projector to seat against.
• Shorten the barrel of the bulb opening so that the retaining washer, locking nut and bulb lock all fit when the projector is mated with the headlight reflector.
• Keeping the projector centered in the reflector so that it will be within the range of the headlight adjustment pin.
First thing to do is shorten the barrel the bulb goes in. Having a stationary disk sander would come in handy. You are going to need to shorten this pretty close to the reflector while keeping the original angles. If the Projector stem that protrudes through the bulb opening was longer it sure would make this part a lot easier. We do not use the Morimoto supplied silicone mounting gasket with this installation project.
After you think you have shortened the barrel enough it is time to open the inside to accommodate the projector stem. Use a Dremel 407 1/2" Drum Sander to slowly open up the inside of the bulb barrel.
Once the opening is large enough to accommodate the projector stem it is time to remove the reflector shield. This shield is made of metal and is locked into the reflector housing. I used a Dremel 561 Multipurpose Cutting Bit to cut this out. Don’t worry about the hole. It will be hidden by the projector shroud.
Now you can smooth the inside ridges of the reflector, around the opening of the bulb barrel (now the projector barrel). Again I used the Dremel 407 1/2" Drum Sander to smooth down the ridges.
 Grind the ridges down inside the reflector
 Barrel ground down and inside bored out
Do everything a little bit at a time and test fit the projector often to see your progress. If you put the projector in the reflector and twist it, there will be black marks on the housing left behind. This will show you where you need to remove material.
 Still need to remove more material so that the projector stem sticks through the reflector more
Once you can install the retaining ring, locking nut and the bulb lock completely down on the projector stem, you are ready to proceed.
 Test fitting the projector in the reflector
I used the Dremel 561 Multipurpose Cutting Bit to cut a small hole in the headlight assembly housing for the high beam solenoid wires. Sand the surface around any holes you make in the body to help the sealant, that will be applied later, adhere to the body. Install the projector into the headlight reflector. Reinstall the headlight reflector into the headlight assembly body with the high beam solenoid wire coming out the back of the body. DO NOT put the male high beam solenoid plug on the wires/pins during this testing/aiming stage. You will just plug the bare pins into the high beam female plug on the MotoControl Bixenon: 9007/9004 wire harness for testing purposes (see more in next step). Install the HID bulb and locking ring.
Modify F250 / F350 Headlight Header
Get the items listed in the Riffraff instructions prior to starting this portion of the project. I used several Dremel 561 Multipurpose Cutting Bits and a Dremel EZ402 EZ Lock Mandrel with a EZ476 EZ Lock 1-1/2" Plastic Cut-off Wheel to complete the header modifications.
Install the Morimoto MotoControl Bixenon: 9007/9004 wire harness. It comes from the factory wired for 9004. You will need a jeweler’s flat blade screwdriver to relocate the harness pins for your 9007 factory harness. You will need to swap the blue and brown pins/wires on the connector plug that plugs into the factory headlight harness.
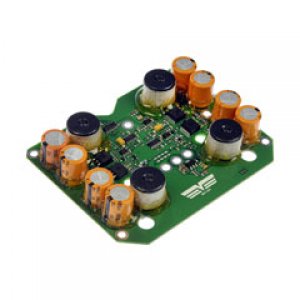
Now install one Morimoto XB55 or XB35 2.0 Ballast with Igniter. ***Only install the one ballast if you are going to finish this one headlight before proceeding with the second headlight. NEVER energize the ballast without it being connected to the HID Bulb. It will destroy your ballast.***
Install your headlight assembly without the lens or signal reflector. Plug the pins into the high beam plug and connect the igniter to the HID Bulb.
Use the instructions in the Riffraff document; check the aiming of the projector. If it will not aim properly, take note of what it needs and remove the assembly from the truck. Pull the reflector and modify as needed to get the projector pointing within the parameters of the adjustment screw. Reinstall and retest as needed.
 Apollo 3.0 Shroud
 Shroud Trimmed to fit
Once you are satisfied with the aiming you can trim the shroud with your Dremel to fit the headlight reflector. Be sure to clip the shroud into the slots on the projector before you start trimming the shroud. When you do your final assembly you will apply a bit of epoxy at these slots to lock the shroud to the projector.
This is the time to install Demon Eyes and/or Halos to the projector and shroud. These wires can be fed through the hole you made in the headlight reflector when you removed the metal reflector shield. You will need to enlarge the hole where the high beam solenoid wire goes through the headlight body.
 Reflector after sandblasting
If you are going to paint the headlight reflector, its time has come. Remove the projector. Lightly sandblast or sand the chrome finish of the reflector. In my case I sandblasted the finish. Primed it with Rust-Oleum 327912 Gray Primer (for plastic) then painted it with Rust-Oleum 7778 Bar-B-Q Black.
 Halo installed on Shroud
After it was dry we reinstalled the projector into the headlight reflector with a dab of silicone on the inside of the reflector. Reinstall the headlight assembly one last time to make sure the aiming is correct both horizontal and vertical, adjust as needed. Make sure your Parking/Turn Signal and side marker plugs mate up with the 05-07 assembly. Test operation of high beam solenoid and any additional demon eyes, halos or other lights. Epoxy the shroud to the projector to keep it secure. Now is the time to fix any issues before final assembly.
 Amber Led Strip Installed
If you are going to add any light strips or additional lights to the inter housing that is still attached to the lens this is the time to compete these additions. In my case I added a yellow LED light strip between the headlight and the parking/turn signal reflectors. I wired these to the parking light circuit.
Lens Reassembly
Remove the HID Bulb from the projector. Reinstall the Parking/Turn Signal Reflector. Put a dab of silicone on the three screws that secure the reflector. Make sure all of your wires have been fished to the outside of the body. Canned air is very beneficial at this point. You want to make sure no dust is present in the projector or headlight housing. Cleaning everything including the lens is very important. Remember not to touch the inside of the headlight lens.
Preheat the oven to 240°F and prepare your workspace with the large towels and microfiber towels.
After oven reaches 240°F put the box of Morimoto RetroRubber in the oven for 2 minutes. Pull a piece long enough to encircle the headlight body.
Stretch the RetroRubber so that it is the same thickness throughout. Put the RetroRubber in the channel you previously smoothed out. Mate the headlight lens back into the body the best you can. Put the assembly in the oven for 20 minutes. Make sure none of your wires fall through the rack onto your oven element or bottom of the oven.
After 20 minutes pull the assembly out and take to your work area. Squeeze the lens into the channel, starting with the lip that has no tabs. Work away from the lip-side and securing the tabs to the lens as you work your way around the lens until all tabs are secure.
Quickly rub any sealant/RetroRubber off the lens with your clean microfiber towel.

Use 100% silicone to seal the body where the wires come out. If you keep your finger covered with saliva you can smooth the silicone out without it sticking to your finger. Let the silicone dry for 24 hours.
 Assembled Headlight
Reinstall the rubber boot on the body at the headlight bulb. Reinstall the HID bulb. Put the plug on the wires for the High Beam Solenoid. I used Permatex Dielectric Grease on all electrical plugs on this project.
Repeat for the other headlight.
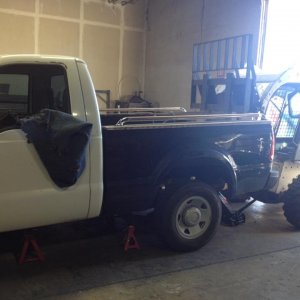
 Installed
Install headlight on truck and enjoy the awesomeness of these top shelf projector headlights that you just built.
Enjoy,
The Grand Pooh-Bah

When I started this project I was not able to find very much information on what to expect or how to accomplish my desired outcome. I live and travel on roads that sometimes have more wildlife activity than human interaction in northern Idaho. I needed substantially more light than the stock headlights offered in order to give me a fighting chance to react to deer, elk or moose crossing the road at night.
I want to share my successes and failures in this project to help save you from some of the frustrations and added expenditures I encountered.
Before I started this project I already tried high end LED bubs and upgraded clear headlight lens. These upgrades provided less than stellar improvements in light where I needed it most, on the sides of the road and down the road to see the reflections of critters eyes.
After substantial research and personal preference I decided to upgrade my 2001 F250 to the one piece headlight/ parking/turn signal assembly of the 2005-2007 F250/F350. This part of the upgrade can be accomplished by following the well explained instructions provided by Riffraff Diesel Performance 99-04 Superduty to 05 Headlight Conversion
First Mistake: In my infinite wisdom and desire for quality I decide to purchase a set of 2005 Ford OEM Headlight assemblies. Ford is using an adhesive to join the lens to the body that is not favorable with oven disassembly. This cost me $140 and one headlight assembly.
I chose a 05-07 aftermarket set with clear reflectors and black inner housing. These are available on Amazon and eBay. These are the actual headlights for 05-07 not the ones for 99-04 that look like 05-07.
In order to install projectors, halos, LED light strips or anything else inside your headlight assemblies you must first gain access to the insides.
Remove the bulbs (if provided), rubber bulb seal, any protective film and the only screw in the corner of the assembly. *Don’t forget to remove this screw*.
Remove all the oven racks except one, which you will put on the lowest rung. Preheat your oven to 240°F.
Prepare a working area with a clean old towel or two. You will also need several clean microfiber towels to remove any adhesive that gets on your lens during disassembly. It is easier to remove this adhesive while it is still warm. You will also need some gloves, narrow flathead screwdriver, short wide blade screwdriver, mini crowbar.
When oven is ready put one assembly in the oven quickly so the heat doesn’t escape. Set the timer for 20 minutes. When time is up put on the gloves and carefully remove the lens and take it to your prepared work area.
Starting in the corner where the clear lens protrudes from the housing body, push the tabs back on the outer edges of the lens. Use the wide blade screwdriver to separate the lens from the body while releasing the tabs as you go around.
You will notice that one edge does not have tabs. This side is held in with a lip. When all of the tabs are released and the lens is lifted away from the body on three sides you will pull the lens out from under the lip. Use something to catch the stringy adhesive as you pull the lens away. You don’t want it on your lens or the inside of the body. This can be messy. Clean any adhesive off the outside of the lens with your microfiber towels. Do not touch the inside of the lens, they do not have a protective coating and will show scratches, even from a microfiber towel.
Set the lens inside a plastic garbage bag on a soft clean surface away from your work area.
Now take your narrow blade screwdriver and smooth out the warm adhesive in the channel where the lens mates with the body. This will help make a better seal when you reassemble.
Now remove the other three screws from the body and the turn signal reflector will come out. Put this in a plastic bag and set aside if you are not going to modify or paint.
Second Mistake: When removing the headlight reflector from the body, be sure that all of the pressure is on the black plastic retainer. If you put pressure on the reflector tabs that hold the black plastic retainer, the tabs will break and you will have a broken reflector.
Release both black plastic retainers on the headlight reflector straight up off the pins with pressure from the bottom. Then pull the lens off the upper corner adjusting pin with your hands. It comes straight out from the body.
Your headlight disassembly is now complete and ready for modifications.
Sorry if this seems long winded but these fine details can make the difference between success and failure. Once you pull the assembly out of the oven you need to have your ducks lined up and ready, in your limited window before the lens cools down.
Preparing the Host Headlight Reflector
This is where your Dremel tool becomes your friend.
Objectives:
• Open up the inside diameter of the bulb socket to accommodate the Morimoto projector.
• Smooth out the ridges on the inside of the reflector around the bulb opening for the projector to seat against.
• Shorten the barrel of the bulb opening so that the retaining washer, locking nut and bulb lock all fit when the projector is mated with the headlight reflector.
• Keeping the projector centered in the reflector so that it will be within the range of the headlight adjustment pin.
First thing to do is shorten the barrel the bulb goes in. Having a stationary disk sander would come in handy. You are going to need to shorten this pretty close to the reflector while keeping the original angles. If the Projector stem that protrudes through the bulb opening was longer it sure would make this part a lot easier. We do not use the Morimoto supplied silicone mounting gasket with this installation project.
After you think you have shortened the barrel enough it is time to open the inside to accommodate the projector stem. Use a Dremel 407 1/2" Drum Sander to slowly open up the inside of the bulb barrel.
Once the opening is large enough to accommodate the projector stem it is time to remove the reflector shield. This shield is made of metal and is locked into the reflector housing. I used a Dremel 561 Multipurpose Cutting Bit to cut this out. Don’t worry about the hole. It will be hidden by the projector shroud.
Now you can smooth the inside ridges of the reflector, around the opening of the bulb barrel (now the projector barrel). Again I used the Dremel 407 1/2" Drum Sander to smooth down the ridges.
Do everything a little bit at a time and test fit the projector often to see your progress. If you put the projector in the reflector and twist it, there will be black marks on the housing left behind. This will show you where you need to remove material.
Once you can install the retaining ring, locking nut and the bulb lock completely down on the projector stem, you are ready to proceed.
I used the Dremel 561 Multipurpose Cutting Bit to cut a small hole in the headlight assembly housing for the high beam solenoid wires. Sand the surface around any holes you make in the body to help the sealant, that will be applied later, adhere to the body. Install the projector into the headlight reflector. Reinstall the headlight reflector into the headlight assembly body with the high beam solenoid wire coming out the back of the body. DO NOT put the male high beam solenoid plug on the wires/pins during this testing/aiming stage. You will just plug the bare pins into the high beam female plug on the MotoControl Bixenon: 9007/9004 wire harness for testing purposes (see more in next step). Install the HID bulb and locking ring.
Modify F250 / F350 Headlight Header
Get the items listed in the Riffraff instructions prior to starting this portion of the project. I used several Dremel 561 Multipurpose Cutting Bits and a Dremel EZ402 EZ Lock Mandrel with a EZ476 EZ Lock 1-1/2" Plastic Cut-off Wheel to complete the header modifications.
Install the Morimoto MotoControl Bixenon: 9007/9004 wire harness. It comes from the factory wired for 9004. You will need a jeweler’s flat blade screwdriver to relocate the harness pins for your 9007 factory harness. You will need to swap the blue and brown pins/wires on the connector plug that plugs into the factory headlight harness.
Now install one Morimoto XB55 or XB35 2.0 Ballast with Igniter. ***Only install the one ballast if you are going to finish this one headlight before proceeding with the second headlight. NEVER energize the ballast without it being connected to the HID Bulb. It will destroy your ballast.***
Install your headlight assembly without the lens or signal reflector. Plug the pins into the high beam plug and connect the igniter to the HID Bulb.
Use the instructions in the Riffraff document; check the aiming of the projector. If it will not aim properly, take note of what it needs and remove the assembly from the truck. Pull the reflector and modify as needed to get the projector pointing within the parameters of the adjustment screw. Reinstall and retest as needed.
Once you are satisfied with the aiming you can trim the shroud with your Dremel to fit the headlight reflector. Be sure to clip the shroud into the slots on the projector before you start trimming the shroud. When you do your final assembly you will apply a bit of epoxy at these slots to lock the shroud to the projector.
This is the time to install Demon Eyes and/or Halos to the projector and shroud. These wires can be fed through the hole you made in the headlight reflector when you removed the metal reflector shield. You will need to enlarge the hole where the high beam solenoid wire goes through the headlight body.
If you are going to paint the headlight reflector, its time has come. Remove the projector. Lightly sandblast or sand the chrome finish of the reflector. In my case I sandblasted the finish. Primed it with Rust-Oleum 327912 Gray Primer (for plastic) then painted it with Rust-Oleum 7778 Bar-B-Q Black.
After it was dry we reinstalled the projector into the headlight reflector with a dab of silicone on the inside of the reflector. Reinstall the headlight assembly one last time to make sure the aiming is correct both horizontal and vertical, adjust as needed. Make sure your Parking/Turn Signal and side marker plugs mate up with the 05-07 assembly. Test operation of high beam solenoid and any additional demon eyes, halos or other lights. Epoxy the shroud to the projector to keep it secure. Now is the time to fix any issues before final assembly.
If you are going to add any light strips or additional lights to the inter housing that is still attached to the lens this is the time to compete these additions. In my case I added a yellow LED light strip between the headlight and the parking/turn signal reflectors. I wired these to the parking light circuit.
Lens Reassembly
Remove the HID Bulb from the projector. Reinstall the Parking/Turn Signal Reflector. Put a dab of silicone on the three screws that secure the reflector. Make sure all of your wires have been fished to the outside of the body. Canned air is very beneficial at this point. You want to make sure no dust is present in the projector or headlight housing. Cleaning everything including the lens is very important. Remember not to touch the inside of the headlight lens.
Preheat the oven to 240°F and prepare your workspace with the large towels and microfiber towels.
After oven reaches 240°F put the box of Morimoto RetroRubber in the oven for 2 minutes. Pull a piece long enough to encircle the headlight body.
Stretch the RetroRubber so that it is the same thickness throughout. Put the RetroRubber in the channel you previously smoothed out. Mate the headlight lens back into the body the best you can. Put the assembly in the oven for 20 minutes. Make sure none of your wires fall through the rack onto your oven element or bottom of the oven.
After 20 minutes pull the assembly out and take to your work area. Squeeze the lens into the channel, starting with the lip that has no tabs. Work away from the lip-side and securing the tabs to the lens as you work your way around the lens until all tabs are secure.
Quickly rub any sealant/RetroRubber off the lens with your clean microfiber towel.
Use 100% silicone to seal the body where the wires come out. If you keep your finger covered with saliva you can smooth the silicone out without it sticking to your finger. Let the silicone dry for 24 hours.
Reinstall the rubber boot on the body at the headlight bulb. Reinstall the HID bulb. Put the plug on the wires for the High Beam Solenoid. I used Permatex Dielectric Grease on all electrical plugs on this project.
Repeat for the other headlight.
Install headlight on truck and enjoy the awesomeness of these top shelf projector headlights that you just built.
Enjoy,
The Grand Pooh-Bah