HoboCoastie
New member
Well, instead of buying the 2WD valance to replace the extremely tall and ground-clearance-robbing 4WD valance, I decided to cut mine down. The project was extremely easy and I saved the cost of buying the 2WD valance minus the $11 it cost me for the edge moulding. I think the 2WD part is like $100. Better off in my pocket.
Here's the project...
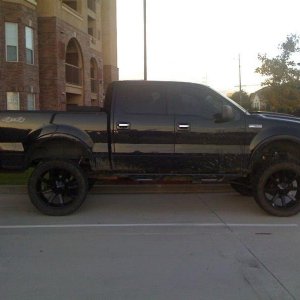
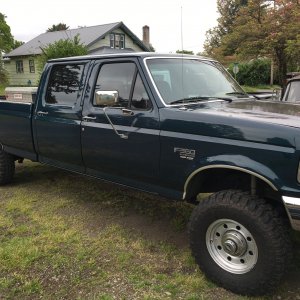
A "before" image showing the stock 4WD valance. Note that this image is stock height with stock tires. In the rest of the images, the truck has the ReadyLift Stage IV lift kit (3.5"F/1.0"R) with 35x12.50x20 Toyo Open Country M/T's installed.

I found it easier to remove the valance for cutting, but I've heard people say they've done it right on the truck.

The 5 ridges across the middle of the valance made great reference points to measure from for a nice straight line. I measured down 2-1/2" and marked it with an ink pen. This gives an overall height of about 3" on the valance after cutting.

I laid out the masking tape along my pen marks in the middle and eye-balled the left side with a slight (un-noticeable) up-slope, then measured from the left edge down to the tape and came up with about 2-3/16". I then measured the right edge with the same 2-3/16" from the left edge and went back over the middle with masking tape from left to right hitting my mark on the right.

I scored the tape line with an Exacto knife. Accuracy trumps depth here, but make sure you score deep enough to see.

I then went over the light score with a utility knife going much deeper.

The deeper score made it easy to complete the cut from the underside when bending the plastic.

A little sanding to smooth the cut edge.

Here's the height after the cut...about 3" or so.

With military discount, this moulding cost me about $11 at Advance Auto. It was the only thing I had to buy for this project and is optional.

This moulding goes on easily. You can use a hair dryer or heat gun for better adhesion, but I've never had it come off.

Moulding all installed and the valance cleaned up and ready for re-installation. Again, the moulding is optional, but I love the clean look it gives the cut edge.

I removed the snow plow brackets as they'll be visible with the shorter valance installed.

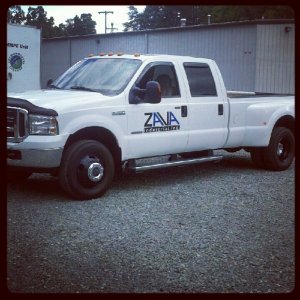
Here's the finished project. I'm really happy with how it turned out. It's like getting a free lift kit.


Here's the project...
A "before" image showing the stock 4WD valance. Note that this image is stock height with stock tires. In the rest of the images, the truck has the ReadyLift Stage IV lift kit (3.5"F/1.0"R) with 35x12.50x20 Toyo Open Country M/T's installed.
I found it easier to remove the valance for cutting, but I've heard people say they've done it right on the truck.
The 5 ridges across the middle of the valance made great reference points to measure from for a nice straight line. I measured down 2-1/2" and marked it with an ink pen. This gives an overall height of about 3" on the valance after cutting.
I laid out the masking tape along my pen marks in the middle and eye-balled the left side with a slight (un-noticeable) up-slope, then measured from the left edge down to the tape and came up with about 2-3/16". I then measured the right edge with the same 2-3/16" from the left edge and went back over the middle with masking tape from left to right hitting my mark on the right.
I scored the tape line with an Exacto knife. Accuracy trumps depth here, but make sure you score deep enough to see.
I then went over the light score with a utility knife going much deeper.
The deeper score made it easy to complete the cut from the underside when bending the plastic.
A little sanding to smooth the cut edge.
Here's the height after the cut...about 3" or so.
With military discount, this moulding cost me about $11 at Advance Auto. It was the only thing I had to buy for this project and is optional.
This moulding goes on easily. You can use a hair dryer or heat gun for better adhesion, but I've never had it come off.
Moulding all installed and the valance cleaned up and ready for re-installation. Again, the moulding is optional, but I love the clean look it gives the cut edge.
I removed the snow plow brackets as they'll be visible with the shorter valance installed.
Here's the finished project. I'm really happy with how it turned out. It's like getting a free lift kit.