Forums
New posts
Search forums
What's new
New posts
New media
New media comments
New profile posts
Latest activity
New showcase items
New showcase comments
Media
New media
New comments
Search media
Members
Current visitors
New profile posts
Search profile posts
Showcase
New items
New comments
Latest content
Latest reviews
Latest updates
Search showcase
Log in
Register
What's new
Search
Search
Search titles only
By:
New posts
Search forums
Menu
Log in
Register
Install the app
Install
Forums
Power Strokes
6.0 Aftermarket
Goin' Low - Thanks to DJM!
JavaScript is disabled. For a better experience, please enable JavaScript in your browser before proceeding.
You are using an out of date browser. It may not display this or other websites correctly.
You should upgrade or use an
alternative browser
.
Reply to thread
Message
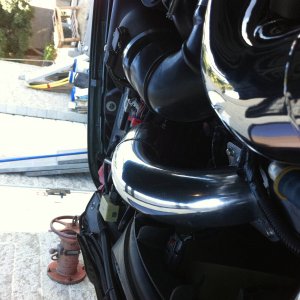
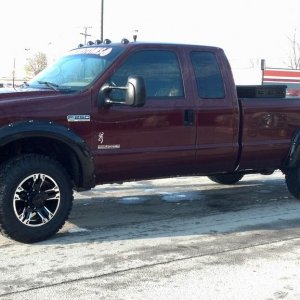
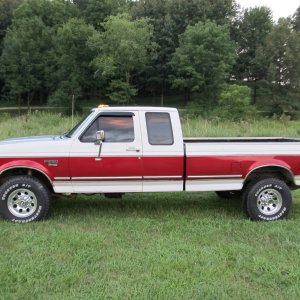
[QUOTE="Power Hungry, post: 541534, member: 1375"] [b]Front Drop Install[/b] [SIZE="4"][B][COLOR="Red"]FRONT DROP INSTALLATION:[/COLOR][/B][/SIZE] To start with, make sure you have a solid work area and GOOD QUALITY jack stands. We don't want to lose our head on this project! Once the front was jacked up and the wheels removed, the first thing we need to do is remove the brake caliper, the brake rotor, the ABS sensor, and the spindle. [SIZE="1"](Click image to enlarge)[/SIZE] [ATTACH=full]101623[/ATTACH] Next, you'll remove the spindle assembly by removing the upper ball joint clamp/alignment adjuster and loosening the lower ball joint nut. DO NOT REMOVE the nut completely until you've separated the lower ball joint. If you do not have a ball joint separator, you can rent one from many auto parts stores. It is also highly advisable that you replace the ball joints while you're there. It will be money well spent. If you don't have a ball joint press, many auto part stores can either rent you one or can replace the ball joints for you. [SIZE="1"](Click image to enlarge)[/SIZE] [ATTACH=full]101624[/ATTACH] [SIZE="1"](Click image to enlarge)[/SIZE] [ATTACH=full]101625[/ATTACH] With the spindle out of the way, you can now remove the front spring. First, disconnect the sway bar link. Once disconnected, jack up the I-beam slightly and then remove the shock absorber. When you let the jack down, this will relieve all the tension on the front spring. With the tension off, remove the upper spring clamp, unseat the spring from the upper perch, and then remove the lower spring clamp. Remove the front spring and set aside. With the spring removed, you can now remove the long bolt connecting the I-beam to the radius arm. [SIZE="1"](Click image to enlarge)[/SIZE] [ATTACH=full]101626[/ATTACH] Remove the bolt holding the I-beam pivot to the frame bracket and then remove the I-beam. The driver's side is pretty easy. When doing the passenger's side, you will not be able to completely remove the bolt from the bracket as it will hit the oil pan. You'll have to completely remove the bracket assembly by removing the 3 bolts that hold the bracket to the frame. This isn't very difficult to do, just a little inconvenient. [SIZE="1"](Click image to enlarge)[/SIZE] [ATTACH=full]101627[/ATTACH] You can clearly see the difference in the positioning of the spindle with the Dream Beams. That's a solid 3" drop. [SIZE="1"](Click image to enlarge)[/SIZE] [ATTACH=full]101628[/ATTACH] As usual, reassembly is the reverse of the disassembly. A few more tips: 1) Install an adjustable alignment clamp for the upper ball joint. This will save time when you go to get the front end aligned. 2) Make sure the radius arm bolt is TIGHT or you will experience popping from the front end when braking. This is particularly noticeable when backing up and then going forward. Once the installation was completed, here's what we ended up with. [SIZE="1"](Click image to enlarge)[/SIZE] [ATTACH=full]101629[/ATTACH] Before the installation, we had a ride height of 5.75" from the top of the tire to the fender. When completed, the ride height dropped to 3.0", and that doesn't include any settling that will occur of the next couple days. [SIZE="4"][B][COLOR="Red"]Coming up next, the rear suspension kit![/COLOR][/B][/SIZE] [/QUOTE]
Insert quotes…
Verification
Post reply
Random media
Latest posts
new build input welcomed
Latest: btoler4th
51 minutes ago
6.4 Aftermarket
OEM LED sport headlights
Latest: ghohouston
Today at 8:37 AM
2017+ 6.7 Aluminum Super Duty
Gauge cluster face plates
Latest: crash86
Sunday at 5:15 PM
6.0 Aftermarket
B
6.4 head gasket job cost
Latest: bowhunter
Sunday at 2:07 PM
6.4 Aftermarket
S
6R140 surging issue
Latest: Smokin 6.0
Sunday at 12:11 AM
6.7 Tech & FAQ
Members online
Gregoryjak
Forums
Power Strokes
6.0 Aftermarket
Goin' Low - Thanks to DJM!
Top