Forums
New posts
Search forums
What's new
New posts
New media
New media comments
New profile posts
Latest activity
New showcase items
New showcase comments
Media
New media
New comments
Search media
Members
Current visitors
New profile posts
Search profile posts
Showcase
New items
New comments
Latest content
Latest reviews
Latest updates
Search showcase
Log in
Register
What's new
Search
Search
Search titles only
By:
New posts
Search forums
Menu
Log in
Register
Install the app
Install
Forums
West Point
The Library
1994-1997 OBS Series General
How-To: Dana 60 Swap
JavaScript is disabled. For a better experience, please enable JavaScript in your browser before proceeding.
You are using an out of date browser. It may not display this or other websites correctly.
You should upgrade or use an
alternative browser
.
Reply to thread
Message
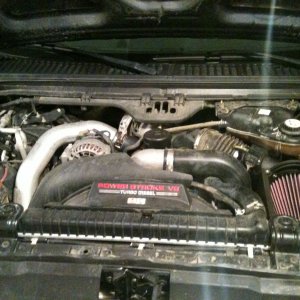
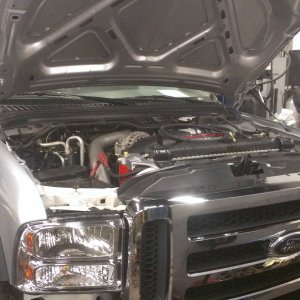
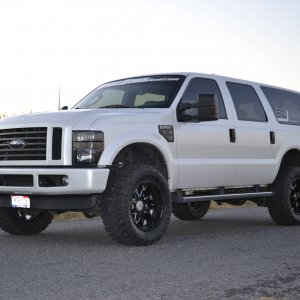
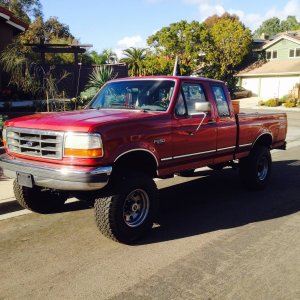
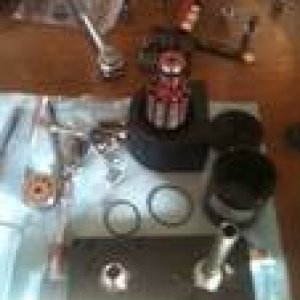
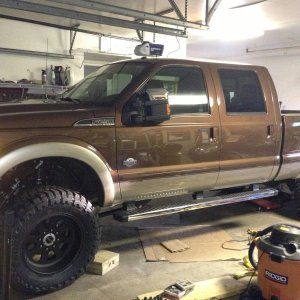
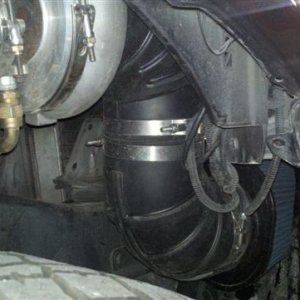
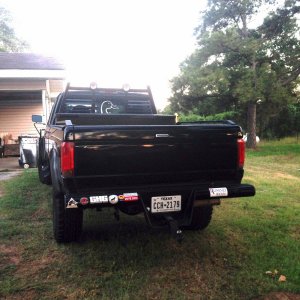
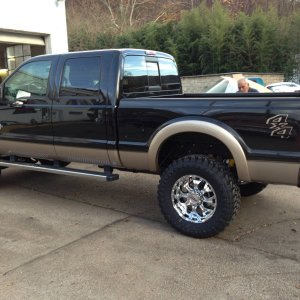
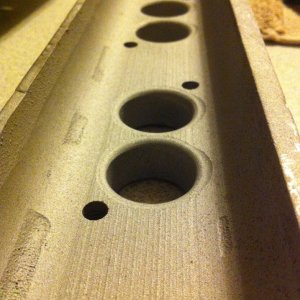
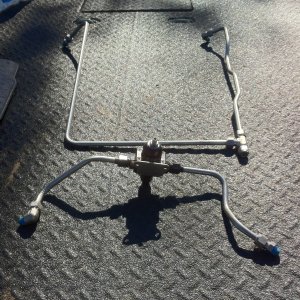
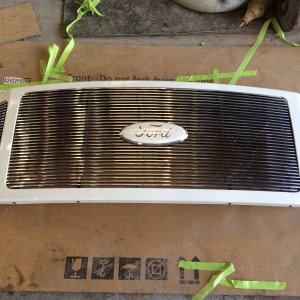
[QUOTE="mjonesjr, post: 207554, member: 1076"] Since there is no "official" how-to on the Dana 60 swap in the F-250's, I thought I would put one together and distribute it to the PSD community. [B]A little history on the Dana 60:[/B] The Dana/Spicer 60 is manufactured by Dana Corp. There is rear axle and front axle versions. The Dana 60 can be identified by the 10 bold asymmetrical cover, along with the "60" cast into the housing. Ford was the first company to use the Dana 60 in the 1950's. During the mid 1970's, Ford, Chevrolet, and Dodge all were using the axle in the front and rear of vehicles. GM began phasing out the Dana 60 in '88 in favor of the independent front suspension. Dodge used the Dana 60 in a passenger side drop till '94 when they redesigned the Ram pickup. Dodge stopped using the Dana 60 in their 3rd generation Ram's. Ford still today uses the Dana 60 in the front of their F-250, F-350, F-450, and F-550 trucks. The axle was manufactured in 2 different versions, a king pin and a ball joint version. All 3 manufactures have used both the king pin and the ball joint axle. [B]Dana 60 Specs:[/B] [I]Ring Gear Diameter:[/I] 9-3/4" [I]Pinion Shaft Diameter:[/I] 1-5/8" [I]Axle Tube Diameter:[/I] 3-1/8" [I]Gear Ratios:[/I] 3.31:1 to 7.17:1 [I]Carrier break:[/I] 3.31:1 - 4.10:1 and 4.56:1 - 7.17:1 [I]Weight:[/I] 500# roughly [B]Parts Needed from F-350 for Swap:[/B] - '86-'97 Dana 60 ('86-'93 are King Pin versions) - F-350 Front Leaf Springs - Track Bar - Track Bar Bracket - Driver Side U-Bolt Plate [B]New Parts Needed:[/B] - Tie Rod End (Moog ES3009R) x 2 - Tie Rod Crossover (Moog DS1071) - Tie Rod to Pitman Arm (Moog DS1068) - Tie Rod Adjustment Sleeve (Moog ES2012S) x 2 - U-bolts (new) x 4 - Gear Oil (Preferred Weight and Brand) x 3 - Diff Cover Gasket or Form-a-Gasket - 24" of Vent Hose The swap itself is fairly easy if you are mechanically inclined. I am basing this how-to on using a '95-'97 Dana 60. If you use a '94 or older Dana 60, you will have to do some modifications to your brakes as the '94 and older axles have a different caliper and caliper mount. I recommend completely replacing all the seals and u-joints in the axle while it is out. It is also a good idea to go ahead and have the rotors turned and replace the bearings in the hub. It is MUCH easier to do the seals with the axle out than it is with it in the truck; trust me, I know. To start the swap, you need to get the front of the truck onto jack stands and the tires off. While jacking up the truck to get it supported, go ahead and remove the front tires and set them out of the way. The truck needs to be supported by the frame. I supported my truck on the frame between the shackle and the bumper. I also used a set of jacks on the rear spring mounts for added safety. You can never be too safe when you will be under a vehicle. [ATTACH=full]183310[/ATTACH] Once the truck is on jack stands and front tires off, you can start by removing the brake calipers. If you are using a '95-'97 axle, tie the axle up out of the way so you don't stretch the hoses. This will keep you from having to bleed the brakes in the future. Next remove the shocks. Removing the shocks should be pretty straight forward. You will more than likely have to use a wrench and a ratchet/socket on the top bolt as the inner fender wont allow an impact gun to fit. [ATTACH=full]183311[/ATTACH] [ATTACH=full]183312[/ATTACH] Now remove the steering linkage from the axle itself. If you have a tie rod separator, you can use it. If you don't, take a 2-5# sledge hammer and smack the stud on the tie rod end; it might take a couple of good hits to get it out depending on how long, if ever, the end has been out. Don't worry about screwing up the end as you will not use it again. Now you can take the u-bolts lose. Even if they have been off before, it might be easier to use a grinder with a cut off wheel to get them off quicker. You should be using new u-bolts anyway on the install. [ATTACH=full]183313[/ATTACH] [ATTACH=full]183314[/ATTACH] Now it is time to get under the truck to remove the pivot point bolts. This is not a bad job if you have a good impact. With the impact on one side and a wrench on the other, the nut should come right off. Once the nut is off both pivot point bolts, use your 2# sledge to drive the bolts out. Make sure you are not directly under the axle when you drive the bolts out so the axle does not fall on you. If the axle does not fall, grab one of the outer ends of the axle and wiggle it until one side falls. Once one side falls, the other side will go with it because of the axle shafts. You can now drag the axle out from under the truck. More than likely, the axle will come out in 2 pieces once you start dragging. To get to hear should take you about 1-.15 hours, depending on how fast you worked and how hard the bolts were to get out. [ATTACH=full]183315[/ATTACH] If you are swapping in the front F-350 leaf springs, now is the time to remove the old F-250 springs. The best way to do this is to remove the rear bolt first to take the tension off the shackle. Once the rear bolt is out, remove the front bolt. You may have to do a little prying to get the springs to come out of the mounts. Once the old springs are out, install the F-350 springs in the opposite as you remove the F-250 springs. Now is the hardest part of the swap. You need to remove the F-250 pivot brackets. The bolts that go through the vertical portions o the cross member are straight forward in their removal since they are all connected on one side. The bolts on the top of the cross member are a pain. They are true bolts and you will have to fish a wrench between the cross member and oil pan to get them lose. Once they are lose, you will more than likely have to grind the majority of the bolt off so it will fit up between the cross member and oil pan to come out. The track bar bracket should now be ready to go in. The bracket utilizes the factory holes on the rear vertical portion of the engine cross member. There is only 1 possible way for the holes to line up. When you hold it up there you will see which holes are the ones you need to use. Get the bracket installed and you will be ready to slide the axle under the truck. Once you have done what you are going to do with the springs (or didn't do), have the old pivot brackets out, and have the track bar bracket installed, now is the time to slide the new axle into place. With the axle slid into place, it is best to take a jack and raise 1 side at a time starting with the driver side to align the leaf springs with the spring perch on the axle. Once you have a side lined up on the springs, go ahead and install the u-bolts for that side; don't tighten them, just snug them. Now go do the same for the passenger side. Once you have both sides lined up, tighten the u-bolts down. [ATTACH=full]183316[/ATTACH] [ATTACH=full]183317[/ATTACH] [ATTACH=full]183318[/ATTACH] [ATTACH=full]183319[/ATTACH] Now that the axle is under the truck, move an extra set of jack stands under the axle so you can put the weight of the truck on the axle. With the weight on the axle, it will allow you to install the track bar without having to rack the axle to one side or another. [ATTACH=full]183320[/ATTACH] Now we are ready to install the steering linkage. When you put your steering linkage together, do so on a work bench. You will want to run your tie rod ends and tie rods 1/2 way through your adjuster sleeve. This will make sure that the sleeves, ends, and rods all have clean threads on them and make the self alignment much easier. Once you have them put together, go ahead and install them on the truck. Remember, the long rod goes between the steering knuckles and the short rod comes from the pitman arm down to the cross over rod. The adjustment on the short rod goes into the pitman arm. [ATTACH=full]183321[/ATTACH] Once you have the steering on, now you can install your shocks and brakes. This is done in reverse order of removal; pretty easy. Be sure to use anti-seize on the bolts, that way when you have to take them off again, they wont be frozen. Now is a good time to inspect your brake pads and install new ones if you need them. [ATTACH=full]183322[/ATTACH] [ATTACH=full]183323[/ATTACH] Now you are ready to install the tires. This is pretty easy and just the opposite of removal as well. Once the tires are on the truck and it is setting on its own weight, go back through and double check all the bolts for tightness. This is just a precautionary step to make sure you didn't tighten a bolt. The easiest part of the swap is doing a quick self alignment so you can drive it to get your official alignment done at a shop. I set my steering wheel straight and adjusted the cross bar to what eye ball looked to be straight tires. I then took a tape measure, and a helper, and measured from outside of tread to outside of tread on the front of the tires. I repeated the measurement on the rear of the tires. I made changes until the measurements were within a 1/16" difference. When the alignment shop did my alignment, they said I was 8* off total toe and 20* off steer straight. Not too bad if you ask me. Now you can drive your truck and enjoy its new stance. Just make sure to double check all the bolts after a couple hundred miles or so. [ATTACH=full]183324[/ATTACH] [ATTACH=full]183325[/ATTACH] [ATTACH=full]183326[/ATTACH] [ATTACH=full]183327[/ATTACH] [ATTACH=full]183328[/ATTACH] [/QUOTE]
Insert quotes…
Verification
Post reply
Random media
Latest posts
T
B&W hitch and shock removal
Latest: TexMac
Yesterday at 2:48 PM
2017+ 6.7 Aluminum Super Duty
6
ISSUES WITH CHOATES WARRANTY
Latest: 6.7powersmoke
Yesterday at 2:12 PM
1999-2015 Superduty Series General
Truck slipping into 4th
Latest: Sterling6.7
Friday at 7:18 PM
6.7 Tech
Do not recommend Choate Engineering
Latest: DEEZUZ
Apr 23, 2025
Newly Enlisted
A few turbo questions and a rant
Latest: ghohouston
Apr 23, 2025
7.3 Aftermarket
Members online
ghohouston
Forums
West Point
The Library
1994-1997 OBS Series General
How-To: Dana 60 Swap
Top