A quick update here. There is more to show but I think I'll wait to get some better pictures and such before I post it up.
Pretty much odds and ends, water pump went back on, fuel lines got routed for diesel and veggie, drain got made.
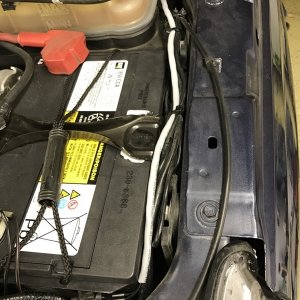
And the battle to have a rust free truck raged on..
Did one bit of patch work where I had taken a bif F hammer when I had first installed the intercooler, ah the good old day :-X19. Then got it roughed up and cleaned up.
Epoxy primer
First coat of epoxy paint. This stuff is the same stuff I used on the oil pan, and again, boy is it nasty stuff.
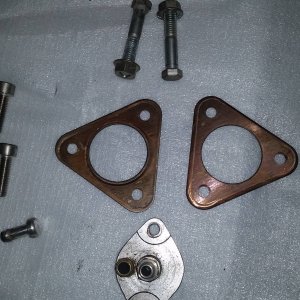
Also had the Oil dipstick reseal kit arrive from Guzzle/Diesel Orings. Pretty slick kit, fairly confident I won't ever have a issue there.
Tomorrow the truck rolls back in so that I can start prepping to have the engine back in. My BTS valve body arrived this week, but UPS dropped the ball on the torque converter, so I won't get the engine set in place tomorrow like i had hoped. But it'll be ready to go tomorrow, and monday evening I'll set the engine back in place and start building around it again.
There is a lot coming together on this, but not too many pics to show for it. I do have what I think is a really helpful little deal for us OBS guys.
First, I got to tackle the some of the transmission upgrades that will hopefully prolong the life of it for some time anyways, its probably gonna have a meltdown but it is what it is.
I chose to go with diesel-sites torque converter. It was a nice balance up upgrade supposedly good for 500-600 HP, and reasonable cost that I won't feel too bad about if/when this thing explodes and takes out the money I invested with it.
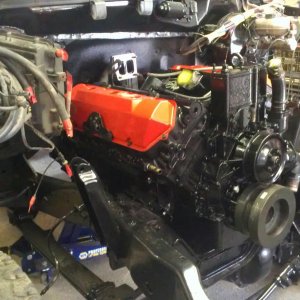
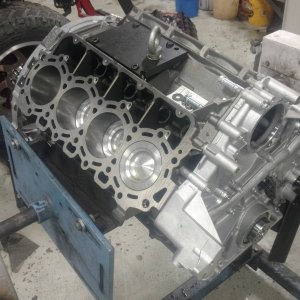
Then the engine was going back in!
And now Im slowly reassembling things and taking my time making sure everything goes back together properly. Pretty happy with how the radiator support came out. Fairly certain I won't have to worry about rust for as long as this truck runs.
This picture shows nothing, but its a BTS valve body installed :thumbsup:
A little more progress
Ok, now here is the nice tip for OBS guys:
I bought a billet thermostat housing from Riffraff ages ago (for a super duty) with hopes of doing some kind of custom pipe or something. Well it came time to figure this out, and after some flexible stainless stuff I bought failed, I had to come up with a new plan.
Installed the diesel site 203 Thermostat and billet housing from Clay.
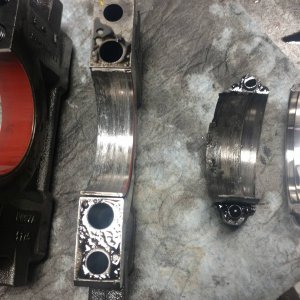
Now, take you original Ford thermostat housing, and cut the bottom off a little higher than the height of the new billet housing. Clean old paint and rust off as necessary.
Now, test fit the trimmed stock thermostat housing with a tight fitting silicone boot (frozen boost.com).
And boom, you're able to run the super-duty thermostat housings, not some hokey reinforcement ring, and not a 200 dollar upper rad hose from diesel site (which I like by the way, I think its awesome but poor people have poor ways and I wasn't about to drop 200 on a rad hose..)
^Paint that baby up, and final fit it with some good hose clamps for a pretty much permanent install.
Hope that helps some guys, really does make a billet housing more attainable for us.
And another short update.
Making progress, but most of it is putting things back together. Had my good friend who has been super gracious with his welder come out and wrap a bunch of stuff last weekend.
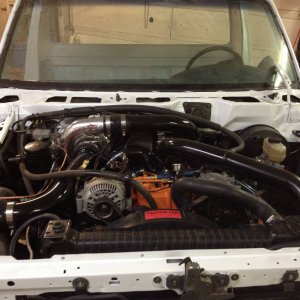
Pretty much got started with mounting the turbo and then connecting the dots for intercooler piping and downpipe. I already had banks intercooler piping, so I opted to just modify these than start from scratch.
So after trimming the banks pipe back, I needed to make these two guys mate up.
And this is the other side coming in.
So I made my own y-pipe, trimmed a 90* to fit in the plenums,
Then worked a hole into the top
And after sitting it in place and getting it clocked properly, attached another 90* on top and welded it together. Also welded in a 1/8th NPT bunch for boost sensor.
^ not sure why that ended up looking kinda weird/racy, the bottom portion ended up really short, so the top looks kind tall/ out of proportion. But oh well, it fits well.
Modified both sections of the banks pipe a bit, although I dont have pictures of both for some reason. The drives side got more cut up to match with turbo..
Also welded in two 1/8NPT bunges on the passenger side pipe in to accommodate for a barb for the MAP line to re-attach to (used to go into plenum), and one is going to be blocked off for now, but will be used for a water-meth nozzle in the future (or a NOS nozzle... :-innocent)
Then we made the downpipe, pretty much re-used as much of the original downpipe I had in there as we could ( a 3 inch flowmaster I bought 10 years ago now). I pretty much disconnected at the slip joint, and then we made a new upper for it.
Its not pretty, but poor people have poor ways, and I had to start drawing the line somewhere on this thing, so it got re-used for now.
And we ended up with this for upper.
Honestly, for fitting it in the truck and having nothing but a zip-cut ^ I feel that came out about as well as it could have. The thing fit together nearly perfectly in the end, much better than gaps I ended up with in the up-pipes haha :-X16.
Finally, I bought a drain plug off amazon, and then got a nut for it and welded a drain plug into the E4OD pan. New ones are pretty reasonable but this one was 6 bucks, so that's even better.
And what might be the best example of lipstick on a pig.. I splurged for schaeffers synthetic tranny fluid. So the old stock E4OD with triple disk TC and valve body is getting the best, hopefully it stays together long enough for me to save a bit of $ again.
And my biggest pet peeve from my previous setup was spending time painting intercooler piping, then scratching the s**t out of it the first time it had to come out. So going with the colour theme on this build, I wrapped the new piping with black exhaust wrap. Im not thinking this is going to be functional or anything, just wont scratch and should look alright.
That's it for now, should have it all installed this weekend if the snow melts. I'll try to record first startup.
-Andrew