Progress report on my build

White_monster

Active member
Joined
May 19, 2011
Messages
3,177
Reaction score
1
Location
The great white north
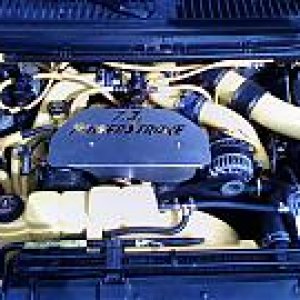
Block is perfect. Piston cooling jets are fine. I think the books wrong. Either way I'll put one in and see if it rotates without hitting. The stock stuff has never been touched till now so that's how ford assembled it and this was a running motor.

That pic of the stock parts on the bench was taken about 10mins after they were all pulled out so no one has switched anything.
 

White_monster

Active member
Joined
May 19, 2011
Messages
3,177
Reaction score
1
Location
The great white north
Here's a pic of the block from the bottom.
8b281c12.jpg

33724e0d.jpg


See, no damage. Cooling jets are good.
 

White_monster

Active member
Joined
May 19, 2011
Messages
3,177
Reaction score
1
Location
The great white north
Skirts are def long enough to touch or they wouldn't notch the piston for the cooling jets. I actually measured the distance from where the ring marks end to the bottom of the cylinder and the skirt is longer. I don't have the numbers anymore thou.
 

White_monster

Active member
Joined
May 19, 2011
Messages
3,177
Reaction score
1
Location
The great white north
Yes. This whole conversation is in regards to how the rod goes in since the piston only goes one way but the book shows the rod mounted different. It's hard to show without having the pistons in hand. Oh well.

Look in the bottom right of the following picture, you'll see the assembly diagram in the manual. The rod is flipped 180 degrees from the way the rods are installed in my stock ones.
IMG_0051.jpg


Here's how the stock rods are put in. Look at how the long side of the rod is placed in relation to the notch for the piston cooling nozzle.
d0d663ef.jpg
 
Last edited:

Extended Power

New member
Joined
May 24, 2011
Messages
2,216
Reaction score
0
Looked at the picture of the new rod and piston...

Is the notch on the left hand side?
 
Last edited:

Extended Power

New member
Joined
May 24, 2011
Messages
2,216
Reaction score
0
Well getting ready to finally start assembly so I figured it would be wise to read my service manual. Started comparing the manual to the pictures I took during disassembly and I have found a discrepancy. Here's the pics. Pic of my piston and rod assembled laying on the manual and you can see the books way to assemble them.

IMG_0052.jpg


Now here's the pics of how the factory ones came out of the engine.

d0d663ef.jpg

ab863f67.jpg


I'm going to install the new parts the same way the old ones came out but I figured I'd pass this info along incase someone doesn't take pics during disassembly.

So did someone pull the stock pistons off the rods at one time while they were out? (And put them on backwards?)
If not...I'd say you better check to see if your piston cooling jets aren't bent completely out of shape, or your block has been notched by the rod caps and bolts...


The stock ones are correct. (Picture threw me off...)
If you pick up the stock piston and rod assembly, and hold it horizontally in front of you with the cooling jet notch at the top...the cap should be facing down. (Because the cooling jets bolt in right beside the cam...which is in the center of the engine.)

Then it doesnt matter which side they go on, because if you put the piston notch into the block facing towards the center of the engine...the cap should face in the downward direction.

Also, aftermarket rods usually have the same sized rod radius, so they can be used on both sides...where on some engines, they only have one side of the rod that is thicker, and that side must face the crank, and the thinner side faces the other rod on the same journal.

The caps should face downward...
The notches towards the cooling jets.

Book/Manual picture is wrong, and so are the new rod/piston assemblies.
 
Last edited:

Dieselcraft

New member
Joined
May 22, 2011
Messages
2,195
Reaction score
0
Location
Moore O.K. Tornado alley
Here's a stock 6.4 rod for reference of difference
It spun a rod bearing
e68af433.jpg

THIS IS OUT OF THE WSM
NOTE: The piston assembly must be installed with the words "Cam Side" toward the inside of the engine, along with the long side of the connecting rod big end split.

NOTE: Use care when installing the piston assembly to not damage the piston cooling tubes. If the tube is bent during installation of the piston assembly, install a new piston cooling tube.

NOTE: Coat the cylinder walls and piston assembly with clean engine oil before installing.

Install the piston and rod assemblies.
Coat the inside diameter of the Piston Ring Compressor with clean engine oil.
Insert the piston into the Piston Ring Compressor. Position the piston, connecting rod and Piston Ring Compressor into the correct cylinder bore.
Using a wood or plastic hammer handle, push the connecting rod and piston assembly down into the cylinder bore.
 
Last edited:

Extended Power

New member
Joined
May 24, 2011
Messages
2,216
Reaction score
0
Yeah...but aftermarket pistons don't have a "Cam Side" stamped on them...

(After their coated anyways...)
 

White_monster

Active member
Joined
May 19, 2011
Messages
3,177
Reaction score
1
Location
The great white north
Alright let's put this to rest.

Notch in the piston must go over the piston cooling jet, I knew this already and there is no aftermarket pistons for the 6.4 and my pistons are from ford but they have been tweaked. Next the long side of the rod, due to the offset rod cap, is to be facing the notch just like the piston/rod assembly's were stock.

So as extended_power said the service book picture is wrong. Anyways this is done so we can move on. Thanks.
 

White_monster

Active member
Joined
May 19, 2011
Messages
3,177
Reaction score
1
Location
The great white north
Small update. We have success. Machine shop got my rotating assembly balanced, chamfered the oil ports on the crank, polished the journals on the crank. I took tonight to install the rotating assembly. All specs are right in the middle where I want them. Also everything spins nicely with lots of clearence with the rods and pistons. Oh well at least it's some progress so I'm happy. No pics as I forgot my camera but I'll see if I can get one in the morning.
 

Latest posts

Members online

No members online now.
Top