08+ door panels,mirrors, and plastics in a 06 f350

Whitezotti

New member
Joined
Jan 24, 2012
Messages
556
Reaction score
0
Location
helotes texas
These are most of my parts . They are all have been painted to
Match my interior to my 06 f350.
Most vehicles pre 08 will have to be painted to match.
My truck interior color is tan. The correct name is medium pebble. In 08 they only made grey (stone) or tan (camel). Camel is close to my tan but has more yellow in it.
I purchased my paint from color tone in San Antonio.
The paint is a interior paint made by sems. It is a latex type of paint. And took a day to make. It was matched from my interior seat cushion. The panels came out great. Next I took the 08 center console lid. Which was camel. Sent it to Richmond upolstery in Houston to get matched to my pebble color. The console lid is leather but not normal leather. It is a more durable leather that cost more. Which they used.
 

Whitezotti

New member
Joined
Jan 24, 2012
Messages
556
Reaction score
0
Location
helotes texas
I have 08 door wire harnesses for both front doors from ford. And for the back I bought used ones from a 08 Harley. The back ones I probably won't use. I just got them so I can use the ome door tweeters built in the door panel. The front harnesses look like they plug right in. Same plug as a 06. The pin out might be different though. I've heard. If not I can use to splice into existing harness.
 

Whitezotti

New member
Joined
Jan 24, 2012
Messages
556
Reaction score
0
Location
helotes texas
The mirrors I bought from ford. They cost more money. But they come with the Pfm relay needed to use to reverse the polarity on the extend of the mirrors. The aftermarket mirrors that are cheaper do not come with the Pfm! The Pfm brand new usually cost 80 to 100$ brand new or off ebay!
I bought the Pfm relay harness. Basically the plug. From recon. It's a 12 volt plug.

I am also currently taking the switches apart for the power windows and power locks. I am installing new led lights for the switches instead of the oem green bulb. It's not to hard if you have a solder gun. FYI do not do this unless you want to spend your time doing this. It might seem easy but there is tons of switches. And some people want to also do that dash lights. This is a pain in the butt! I am just doing the door switches for now! I am doing led white. Because my truck is white. And my exterior headlights are hid 6k which are white looking. So is my fog lights. So is my clerence lights. Which I'm not sure is legal to
Just let you know. As far as I know it's legal in Texas. I also have led side mirror lights on my 06 mirrors. Which are amber and clear lenses. I'm switching to the lights above!

For the rear lights I have white led back up lights in my 08 to 14 tail lights. Which I spliced in the new harness for. These are the reverse lights. I also have led fender lights on my dually. Which are clear lenes with red and amber lights. The 3rd brake light is the same clear. I also have superduty door sill lights. Chrome with blue lights. From recon. Which I hope accent with my white led door switches.
 

Whitezotti

New member
Joined
Jan 24, 2012
Messages
556
Reaction score
0
Location
helotes texas
If anyone wants to see certain pictures let me know prior so I can take them. I will
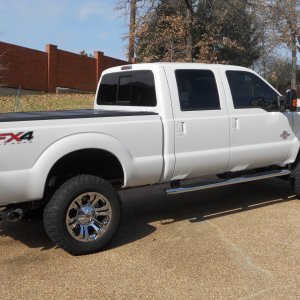
Be updating some more pictures tommrow . The paint and the brand names . The preping adhesives. And etc. I also bought the mirrors with no covers because you have to buy the primered covers seperate from ford. These are the covers that can be painted. Which is shown above the white covers which I painted. The normal black textured covers most likely come with the factory mirrors. I will be showing the paint I used for the the mirror caps to. It is oxford white color . Z1 color code. It's not the new white platnium on the 10 to 14 models wich is metallic. My truck is plain white. I could of used DuPont paint but I used cheaper paint which is same color. It is significantly cheaper than DuPont, 3 times cheaper. I used the cheaper paint because it is such a small surface. If it was bigger I would of bought DuPont.
 

Whitezotti

New member
Joined
Jan 24, 2012
Messages
556
Reaction score
0
Location
helotes texas
The lock and unlock switch above. (Second to last picture) has an example of the new LEDs installed. Most switches have one light per switch. Except the door lock. The door lock is just an example put together. It's not fully how to do it. I remove the whole plastic around the bulb. FYI the black round plastic. And take the wire and solder it to the existing wire for the lights . Be sure not to burn your board. I prefer a cheap solder gun that is not to strong. I will post more pics of the complete soldered lights. If you have trouble telling if the light works or not before you put it back together . Take a. 9v battery and touch it to the bottom metal prongs on the board where the harness connects. You might have to flip the battery around to get the right connection
 

Whitezotti

New member
Joined
Jan 24, 2012
Messages
556
Reaction score
0
Location
helotes texas
Painting prep

I used the grey scuff pad above to scuff the plastic on the door panels. Make sure you get the light scuff pad. Like the one above. There is a red scuff pad that people use but that pad is to rough. This will affect your paint if you scuff it to much. The latex paint will have hairs of paint afterwards if you scuff to much. You can remove these hairs but they are a pain in the but if you have them.

Second I used the special soap to clean the plastic and rubber grab handles . It works very well and has little scuff beads included.

Third I used the adhesive promotors above. The purple one I used second which is cheaper . But that one works well on the rubber grab handles . It is very important to use this adhesive. If you do not use it. The paint will not stick to the rubber . I've expeirenced this in the past. That spray you apply two times and let dry right before you paint. I used the first prepping adhesive for the first plastics. It tells you to wipe off. The purple can asks you to let dry. The purple can worked best. I
Used the purple can for the rest of the plastics and panels and handles.

Fourth no priming. the paint is ready to apply

Fifth- painting perferably use a small paint gun or touch up gun.

These instructions are for interior plastics and rubber interior items and door panels.
I will give instructions for exterior paint later.
 

Whitezotti

New member
Joined
Jan 24, 2012
Messages
556
Reaction score
0
Location
helotes texas
For exterior paint I used nason. Which is a third of the price of DuPont. I used nason because of the small surface area.

I prepped the mirror covers with the grey scuff pad and 600 grit and 1000 grit sand paper. The softer the sanding the better it sticks. My mirror covers were already primed grey from factory. So I just painted after prepping. You may want to consider doing a primer coat.

The paint I mixed with the reducer. I think it was 8:1 . You should read the instructions obviously . The paint is a z1 ford exterior paint. Other known as Oxford white. I applied 3 coats. At least do 2! You should wait at least 15 to 30 minutes before applying clear coat. Clean your paint gun in the mean time.

Next is the clear coat. You mix that with the activator. 4:1 I believe. I applied 2 coats letting them dry between coats for about 10
Minutes between. Some people might wait longer or shorter. It's their preference .

After your done you can sand down the mirror covers if they are a little rough . Make sure if you do. Use high grit paper. At least 1000 to 2000. I've heard people using less but If like to be safe.
 

Whitezotti

New member
Joined
Jan 24, 2012
Messages
556
Reaction score
0
Location
helotes texas
Back to the door panels. This is the connection of the door wire harness. This particular harness is a 08 harness I purchased from ford. My truck is a 06 and the plug it self is identical. I'm worried about the pin out of the wires. If worse comes to worse I can splice the door lock plug in and the mirror plug. And probably the tweeter plug if it's not to difficult
 

Whitezotti

New member
Joined
Jan 24, 2012
Messages
556
Reaction score
0
Location
helotes texas
http://powerstrokearmy.com/photopost/data/500/medium/image206.jpg

http://powerstrokearmy.com/photopost/data/500/medium/image205.jpg
First two pictures are the 08 mirror adjustment switches for extending, folding, adjustments. You can notice i am not installing the memory switch. It seems like to much of a pain in the butt.

http://powerstrokearmy.com/photopost/data/500/medium/image209.jpg
This is the plug to the rear door wire harness for both back door. Which i am not sure if they are the same for a 06 superduty. The picture is of a 08 rear door wire harness.

http://powerstrokearmy.com/photopost/data/500/medium/image208.jpg

http://powerstrokearmy.com/photopost/data/500/medium/image210.jpg
Last two pictures are the 08 tweeter backside, and the tweeter extention wire that plugs into the door harness.
 

Whitezotti

New member
Joined
Jan 24, 2012
Messages
556
Reaction score
0
Location
helotes texas
diagram for the 08 door wire harness
http://powerstrokearmy.com/photopost/data/500/medium/image211.jpg

08 mirror power everything except memory, with clear recon light.
http://powerstrokearmy.com/photopost/data/500/medium/image213.jpg

08 door panel
http://powerstrokearmy.com/photopost/data/500/medium/image214.jpg

This is the difference between camel (tan) and medium pebble (tan) .
Top lid camel bottom lid pebble
http://powerstrokearmy.com/photopost/data/500/medium/image215.jpg

This is the difference betwwen 08 stone grey and a 2001 superduty grey. im not sure of the name of grey. center console is 08, the rest of truck is 01 grey.

http://powerstrokearmy.com/photopost/data/500/medium/image216.jpg
 

Latest posts

Members online

No members online now.
Top