LawnRanger
New member
Last week I went to back out of the drive way in the plow truck, and when I shifted into reverse I heard a SNAP, and the lever was all sloppy. It had been sloppy for a few years, but now I couldn't put it back in park, but I was able to drop it into neutral. Towed it to the shop w/the Ventrac and I found that the tube for the gear selector (plunger) had broke. Good thing it's not snowing or I'd be SOL.
I made some posts as to how I was fixing it, and I've been getting some questions, so I decided to start a thread on how to fix the problem of a sloppy gear selector. At the end I will also address a broken or miss aligned gear indicator arrow.
Your problem is most likely bad bushings, but if your going to dig in far enough to replace the bushings, you may as well replace the tube, plunger, bushings, and the rear bushing cap.
First remove the lower dash cover from under the steering column using a T20 Tourques bit, or a 9/32 socket.


Next remove the 4 screws from the bottom column cover.

Don't forget the one on the right at the back.

Now if you have a tilt wheel, you'll need to remove the tilt lever before you can take off the lower cover.
Next (if you have tilt wheel you can skip this step) remove the upper dash cover, so you can remove the upper column cover. To do this use a knife or flat screw driver to remove the cover caps.

Then remove the 2 screws. 1 under each cap on either side of the column. When you take this off don't forget to unhook your fuel tank switch, and the wait to start light.

Now, before you can remove the upper column cover, you will need to remove the ignition switch by sticking a punch in the pin hole. Then with the keys in the ignition, turn it clock ways a quarter turn, and pull the switch out.


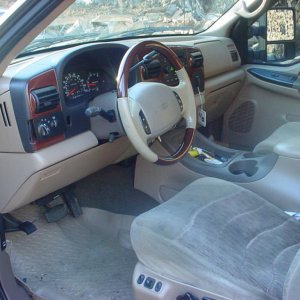
Now pull the upper cover off your column, and it should look like this.

Next, unhook the wiring block under the column using a 7mm socket. Also unhook the connection behind the wiring block. Now is a good time to unhook the shifter cable from the gear selector too.


Now remove the 4 13mm nuts that holds the steering column up, and lay the steering wheel on the seat.

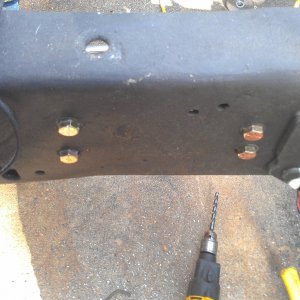
The next part I forgot to take a pic of, but I know you guys are smart enough that it won't mater. You will need to remove the caps that go over the plastic bushings, and hold the whole assembly in. They look like the straps that hold electrical conduit to the wall. You will use a T30 torques bit.
Now you're ready to pull the assembly out.
This is where my tube was broke.


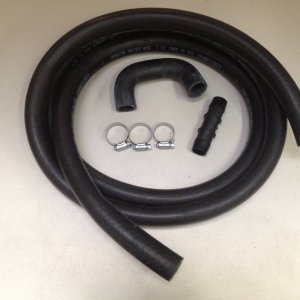
These are the parts and the Ford part #s you will need. Cost should be about $70 - $100 depending on the dealer.
1-Tube.......1F1Z7212AA
1-Camp......F2DZ7E400A
2-Bushing...F3TZ7L278A
1-Plunger...F7DZ7R264AA
Now put it all back together and you'll find your shifter works almost as good as new, if not as good as new.
PART II The Gear Indicator Arrow
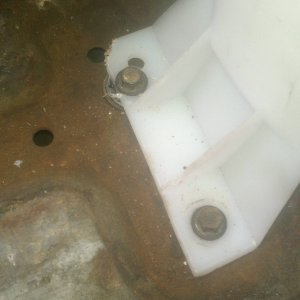
Some have asked about the gear indicator arrow. This was not working on one of my trucks. The problem was the white plastic keeper was all busted up. For reference this is the new one.

To get this from Ford, you must buy a whole new Indicator Gauge Assembly Kit. At my dealer it was $25. So I went and got the white plastic keeper at a junk yard. Cost $0. I found it, pulled it, and they said screw it, just take it.
If that's not your problem I've heard the cable can brake. Well, after screwing around with it, when I went to install the plastic keeper, I found the cable has broken at the base of the adjustment threads. Well I was too lazy to go back to the junk yard, so I used JB Weld, and it worked great. Now use the black wheel to fine tune where the orange arrow points to.


I hope this has helped some of you.
I made some posts as to how I was fixing it, and I've been getting some questions, so I decided to start a thread on how to fix the problem of a sloppy gear selector. At the end I will also address a broken or miss aligned gear indicator arrow.
Your problem is most likely bad bushings, but if your going to dig in far enough to replace the bushings, you may as well replace the tube, plunger, bushings, and the rear bushing cap.
First remove the lower dash cover from under the steering column using a T20 Tourques bit, or a 9/32 socket.
Next remove the 4 screws from the bottom column cover.
Don't forget the one on the right at the back.
Now if you have a tilt wheel, you'll need to remove the tilt lever before you can take off the lower cover.
Next (if you have tilt wheel you can skip this step) remove the upper dash cover, so you can remove the upper column cover. To do this use a knife or flat screw driver to remove the cover caps.
Then remove the 2 screws. 1 under each cap on either side of the column. When you take this off don't forget to unhook your fuel tank switch, and the wait to start light.
Now, before you can remove the upper column cover, you will need to remove the ignition switch by sticking a punch in the pin hole. Then with the keys in the ignition, turn it clock ways a quarter turn, and pull the switch out.
Now pull the upper cover off your column, and it should look like this.
Next, unhook the wiring block under the column using a 7mm socket. Also unhook the connection behind the wiring block. Now is a good time to unhook the shifter cable from the gear selector too.
Now remove the 4 13mm nuts that holds the steering column up, and lay the steering wheel on the seat.
The next part I forgot to take a pic of, but I know you guys are smart enough that it won't mater. You will need to remove the caps that go over the plastic bushings, and hold the whole assembly in. They look like the straps that hold electrical conduit to the wall. You will use a T30 torques bit.
Now you're ready to pull the assembly out.
This is where my tube was broke.
These are the parts and the Ford part #s you will need. Cost should be about $70 - $100 depending on the dealer.
1-Tube.......1F1Z7212AA
1-Camp......F2DZ7E400A
2-Bushing...F3TZ7L278A
1-Plunger...F7DZ7R264AA
Now put it all back together and you'll find your shifter works almost as good as new, if not as good as new.
PART II The Gear Indicator Arrow
Some have asked about the gear indicator arrow. This was not working on one of my trucks. The problem was the white plastic keeper was all busted up. For reference this is the new one.
To get this from Ford, you must buy a whole new Indicator Gauge Assembly Kit. At my dealer it was $25. So I went and got the white plastic keeper at a junk yard. Cost $0. I found it, pulled it, and they said screw it, just take it.
If that's not your problem I've heard the cable can brake. Well, after screwing around with it, when I went to install the plastic keeper, I found the cable has broken at the base of the adjustment threads. Well I was too lazy to go back to the junk yard, so I used JB Weld, and it worked great. Now use the black wheel to fine tune where the orange arrow points to.
I hope this has helped some of you.