The 90's called, they want their interior back

Pwnm30rdi3

Member
Joined
Jun 10, 2013
Messages
472
Reaction score
0
Location
Indianapolis, IN
Crazy right? Below is a link to a decent article about using expandable foam for stiffening frame.

Exerpt:
Higher densities of foam can increase stiffness by up to 300 percent. Since we cannot retool custom parts to redo the Z's body, we figured that this would be an excellent, low-cost way of greatly increasing chassis stiffness. Injecting foam is not a new technique for chassis stiffening. The Infiniti Q45 uses this sort of foam in some of its chassis members to increase stiffness, as do a few other premium cars. In fact, the foam we chose is the foam recommended to repair damaged Q45s.

http://www.modified.com/projectcars/0006scc_project_nissan_300zx_part_5/#ixzz34qTA92sf
 

Pwnm30rdi3

Member
Joined
Jun 10, 2013
Messages
472
Reaction score
0
Location
Indianapolis, IN
Here is an update on the interior:

I put 2 coats of polyurethane on all the wood trim. Debating whether or not to do 3 coats for a more smooth finish.
20140616_183005_zps1b6b9884.jpg


Pulled out all these door panel inserts. I am stripping off the nasty cloth and re-upholstering it with some vinyl.
20140610_0055320_zps4891d346.jpg

IMG_0886_zpsbde7b1e6.jpg
 

Pwnm30rdi3

Member
Joined
Jun 10, 2013
Messages
472
Reaction score
0
Location
Indianapolis, IN
Now that the polyurethane on the wood has had 72 hours to dry, I began working on it.
The wood that screwed into the headliner had old ghetto rigged rope lighting in it. I pulled all the old rope lighting out and bought some 12v 3/8" rope light.
I also bought a sheet of acrylic diffuser. I cut the sheet into slivers and glued them into the channels of the wood. This gives the rope light a more even and softer dispersion of light.

20140622_004144_zpscd7aa575.jpg

20140622_004148_zps50bfa71f.jpg

IMG_0792_zps7803d75c.jpg

IMG_0798_zpsb9b0c59e.jpg


I also painted some more interior pieces:
20140618_211835_zps1309d364.jpg


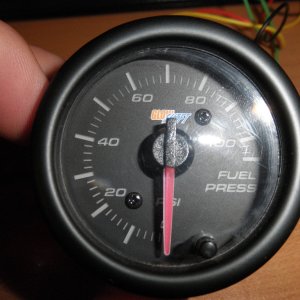
Gauges painted to match:
IMG_0832_zps917059c6.jpg


Finished shots of the kick panel tweeter pods:
IMG_0809_zps2a8c523e.jpg

IMG_0813_zps9ebcbecc.jpg


I also put the door panels back together. I got the vinyl inserts back from the upholstery shop. They look great, but not 100% happy with them. If you look closely at the door panel insert, you will see a body clip pushing out on the vinyl. The upholstery shop claimed these would go away with time, I have a hard time believing that..
IMG_0816_zps61820503.jpg


Anyways, don't be fooled by the above glamour shots. The interior is still a mess:
IMG_0801_zpsb5252d61.jpg
 

JD3020

Active member
Joined
May 18, 2011
Messages
4,002
Reaction score
0
Location
Farmersville/Dayton, Oh
Wow, that looks amazing!

I'm curious, have you ever crafted pillar pod into the stock pillar, making it all one piece? I've got a quad pod in my truck, and i'd love to have it all one piece that looks factory instead of the current ****ty looking pod screwed onto the factory pillar piece.
 

Pwnm30rdi3

Member
Joined
Jun 10, 2013
Messages
472
Reaction score
0
Location
Indianapolis, IN
Wow, that looks amazing!

I'm curious, have you ever crafted pillar pod into the stock pillar, making it all one piece? I've got a quad pod in my truck, and i'd love to have it all one piece that looks factory instead of the current ****ty looking pod screwed onto the factory pillar piece.

I have fiber glassed custom pillar pods for friends cars. Mine is still 2 pieces though.
I'd be more than happy to graft the pillar pod and a-pillar together for you though! I wouldn't be able to do it for about a month though. I'm doing a compound set-up and trying to finish the interior all at once, it's a bit hectic! PM me if you are interested!
IMG_0837_zps5498dc41.jpg
 

Pwnm30rdi3

Member
Joined
Jun 10, 2013
Messages
472
Reaction score
0
Location
Indianapolis, IN
Got the new shifter lever & boot installed today (the old one was cracked). Also got the Airbag assembly in place. Steering wheel is looking much better! Next task is to begin modifying the old steering column plastics.
VjA7df8l.jpg


Another work in progress... Arduino and Parallax RFID Reader. This is my future ignition switch. Swipe RFID to turn on ignition, swipe RFID to turn off ignition.
2povzXEl.jpg


Doing some modeling for the overhead center console, a new switch plate. It's about time to turn on the CNC machine again.
RjZK3zXl.jpg
 

Pwnm30rdi3

Member
Joined
Jun 10, 2013
Messages
472
Reaction score
0
Location
Indianapolis, IN
I went to the junkyard and pulled a few steering columns apart. Harvested some steering shafts. I have 2 stock shafts left if you want to purchase, them!
20140819_1727510_zps4db2f504.jpg


I used a metal planer to do the machining, then I mounted the steering shaft in an indexing three-jaw chuck, I set it to rotate 60 degrees - 6 times, resulting in a hexagon. This took me about 2 hours to get everything set-up and machined.
After I had the shaft machined, I did a test fit. After the test fit, I pressed in a taper pin as a safety measure. Originally I wanted to have an entire shaft machined. Unfortunately I couldn't find a shop willing, due to liability.
KlWZKykl.jpg
 
Last edited:

Jomax

Active member
Joined
May 18, 2011
Messages
8,576
Reaction score
7
Location
Arizona
Loving this! Keep up the great work!

Sent from my SM-N900V using Tapatalk
 
Top