2014 Sema project

johnp115

Active member
Joined
Feb 1, 2013
Messages
2,211
Reaction score
0
Location
Southern MD/Charlotte NC
I know the tips come off the lug but how careful are you going to have to be with putting a socket over the lug and torquing it down(without damaging/scratching the black on the lug)? Just curious

Literally the first comment I've posted in this thread thats just not saying ":drool:"

But still... :drool: lol.. killer work man. Love this build
 

jordan572

New member
Joined
Mar 17, 2013
Messages
487
Reaction score
1
I know the tips come off the lug but how careful are you going to have to be with putting a socket over the lug and torquing it down(without damaging/scratching the black on the lug)? Just curious

Literally the first comment I've posted in this thread thats just not saying ":drool:"

But still... :drool: lol.. killer work man. Love this build

Might not have seen it but the lugs come with an extra deep socket also,

IMG_2157.jpg
 

01pwrstkr

New member
Joined
Feb 4, 2014
Messages
4,918
Reaction score
1
Location
Polk County NC
That is the best looking set of horns I've ever seen! The black breaks it up just enough! Awesome awesome work!

"3 can keep a secret if 2 are dead"
 

carter38

New member
Joined
Apr 18, 2014
Messages
30
Reaction score
0
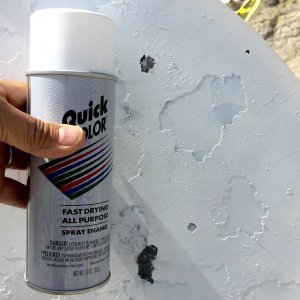
Sorry, I meant to post again by now. Anyway we sprayed the next booth full of parts. This one contained more parts for the compressor (crankcase, filter housing) and a slew of bumper parts including all the mounting brackets. We also sprayed the inside of the rear truss going over the rear axle before we weld it on for obvious reasons. The motor mounts and the amp/processor mount plate we worked up was also sprayed black.

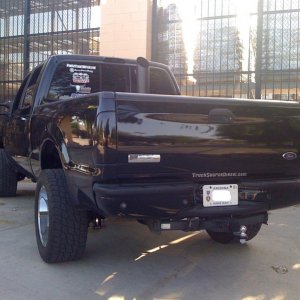
The bumpers before tear down, the 4 wheel drive valence is laughable imo.
IMG_2413.jpg

IMG_2416.jpg


Ready for paint,
IMG_2429.jpg

IMG_2434.jpg

IMG_2433.jpg

IMG_2423.jpg

IMG_2422.jpg

IMG_2425.jpg

IMG_2426.jpg

IMG_2432.jpg

IMG_2437.jpg

IMG_2439.jpg


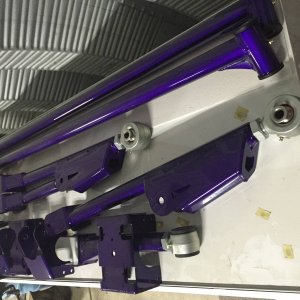
Can't touch the welds on these parts, look at the heat pattern on the back side of this truss,
IMG_2440.jpg

IMG_2441.jpg


And after paint,
IMG_2449.jpg


:naughty:
IMG_2502.jpg

IMG_2503.jpg

IMG_2505.jpg

IMG_2506.jpg

IMG_2509.jpg

IMG_2510.jpg

IMG_2512.jpg

I agree with you that the valence is terrible on a truck. What are your plans with yours? I thought about cutting a couple inches off looking for ideas?
 

RedRice589

New member
Joined
Dec 12, 2012
Messages
6,079
Reaction score
0
Location
Ocala, Florida
I agree with you that the valence is terrible on a truck. What are your plans with yours? I thought about cutting a couple inches off looking for ideas?

Let's do us all a favor when you want to post don't quote all 430 pics. It his thread he'll reply. Please.
 

carter38

New member
Joined
Apr 18, 2014
Messages
30
Reaction score
0
Let's do us all a favor when you want to post don't quote all 430 pics. It his thread he'll reply. Please.

Wow it's called a mistake I didn't realize it did that until after I posted it. I tried to delete and redo it but didn't see where I could delete the post and start over. Get a mod to delete it if it bothers you that bad.
 

RedRice589

New member
Joined
Dec 12, 2012
Messages
6,079
Reaction score
0
Location
Ocala, Florida
Wow it's called a mistake I didn't realize it did that until after I posted it. I tried to delete and redo it but didn't see where I could delete the post and start over. Get a mod to delete it if it bothers you that bad.

Not legit being a dick it's just 30 pics long lol my bad man. Just mentioning it.
 

jordan572

New member
Joined
Mar 17, 2013
Messages
487
Reaction score
1
Let's do us all a favor when you want to post don't quote all 430 pics. It his thread he'll reply. Please.

Haha, my head was spinning for a second looking at all those picture again. Been real busy lately, I'll straighten out the valence question in a moment here.
 

jordan572

New member
Joined
Mar 17, 2013
Messages
487
Reaction score
1
Wow it's called a mistake I didn't realize it did that until after I posted it. I tried to delete and redo it but didn't see where I could delete the post and start over. Get a mod to delete it if it bothers you that bad.

No worries carter, we've all done it and caught crap for it before. Anyway here is a picture of the 4 wheeler vs 2 wheeler valence. Honestly changes the look of the whole front end. And don't even think about removing the valence and leaving it off. I've seen some people do that and it looks terrible, here's two quick pictures I took.

IMG_2537.jpg

IMG_2413.jpg

IMG_2538.jpg
 

jordan572

New member
Joined
Mar 17, 2013
Messages
487
Reaction score
1
In this box is one of the more over the top things for the project yet, I am running the accuair e level air management system. I am also running the ilevel add on so I can control the truck wirelessly with an apple device of some sort. I didn't think my phone was cool enough, I had to get something that fit the truck more.

IMG_2658.jpg


An Ipad!,
IMG_2659.jpg


:morons:
IMG_2660.jpg


Colorware out of Winona Minnesota brought some color to this one, sorry we didn't paint this one ourselves.

IMG_2705.jpg

IMG_2706.jpg

IMG_2661.jpg

IMG_2707.jpg
 
Last edited:

jordan572

New member
Joined
Mar 17, 2013
Messages
487
Reaction score
1
I buttoned up the audio system, this took some serious time. The only thing left to do is the front door speakers once the cab is off the frame and I can get better access to the doors.

With the 13+ trucks with navigation comes a pretty decent speaker setup. But this makes it more complex to wire, probably not hard for a car audio specialist but I am far from that. Basically you have to use splice into the sub, woofers and tweeters to receive a full range of signal. This signal is fed to the Jl summing interface which I mounted in the old subwoofer hole. The summing interface basically sums all the signal and puts out a full range signal to the Jl cleansweep processor that actually cleans the signal. Finally from there audio cables went to the Jl HD 900/5 channel amp. I spliced into the factory turn on for the original amp, that turn on turns on the summing interface, the summing interface then is wired to turn on the processor. Finally the processor turns on the amplifier and you have sound, :fustrate:.

The mount plate we made holds the amp on top with the cleansweep processor hanging on the bottom. There isn't enough room to mount both on top. I also installed a jl 13tw5 stealthbox that fit like a glove, the rear heated seat control module had to be relocated however. I honestly couldn't believe it when the whole show fired up and played the very first time I tried it :rockon:. After endless soldering, shrink wrapping and wire loom everywhere it turned out decent. Probably could have been a little bit cleaner but honestly this wore me out. I have a whole truck to put together still, so glad to have the audio done.

Factory pigtails to amplifier,
IMG_2667.jpg

IMG_2670.jpg

IMG_2668.jpg

IMG_2673.jpg

IMG_2698.jpg

IMG_2700.jpg

IMG_2710.jpg

IMG_2711.jpg

IMG_2714.jpg

IMG_2715.jpg
 

PTSUPERD

New member
Joined
May 16, 2011
Messages
9,115
Reaction score
0
Badass man! Good call on JL. I have a 900/5 in my truck and love it.

This is awesome build.
 

Latest posts

Members online

No members online now.
Top