DIY: HID Projector Retrofit Guide

gigabit

New member
Joined
Oct 15, 2013
Messages
78
Reaction score
0
Location
Florida
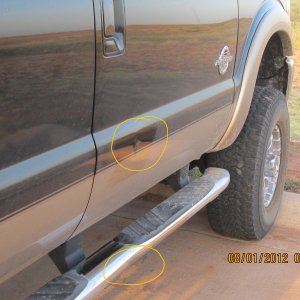
Ill have to pick up some oven cleaner then because that does sound wayyyyy to easy. got my mini d2s square projectors and everything wednesday from the retrofit source. then whem i looked in the box there was a paper saying the amber XB led strips are on backorder and wanted to do a little custom leds in there so thats gonna push my retro fit back. i called friday and they told me to call back tuesday because they didnt have an ETA on the leds yet.

for anyone interested the square d2s projectors are 20% off until end of may on TRS even on the full retrofit kit, i couldnt pass it up and these are even nicer than the mini h1 projectors. use coupon code XLENS20. they posted the sale on facebook last week i believe. but its only on the square lens(x lens) FYI


yea i definately took advantage of the same deal and bought the apollo 2.0 square shrouds.

for anyone who may not know, just be aware that the rear of the d2s, whether x or o version, is larger than the mh1's. it isnt a big deal and the only thing different is that you'd have to create a larger rear opening and the shroud is larger. a dummy shroud for the upper is probably not going to work as well as the h1's if u want the quad projector look. the reason is that it's 3" vs 2.5" lenses and housing size. finally, xb leds arent compatible with the d2s x versions.

my second set of headlights will have the d2s in the lower bowl and maybe some form of rigids up top :)

0F8834E2-02AA-4D78-9ABC-0FE974289FD2_zpsbwcmuttz.jpg


E372B807-DD0A-474B-A030-134B56A5712B_zpsnekrtevy.jpg


C494D058-3FDC-4D24-96ED-202A3D5CF32B_zps026cdtcy.jpg


Sent from my iPhone using Tapatalk
 
Last edited:

travisH3

New member
Joined
Feb 18, 2013
Messages
166
Reaction score
0
Location
Cincinnati, Ohio
yea i definately took advantage of the same deal and bought the apollo 2.0 square shrouds.

for anyone who may not know, just be aware that the rear of the d2s, whether x or o version, is larger than the mh1's. it isnt a big deal and the only thing different is that you'd have to create a larger rear opening and the shroud is larger. a dummy shroud for the upper is probably not going to work as well as the h1's if u want the quad projector look. the reason is that it's 3" vs 2.5" lenses and housing size. finally, xb leds arent compatible with the d2s x versions.

my second set of headlights will have the d2s in the lower bowl and maybe some form of rigids up top :)

0F8834E2-02AA-4D78-9ABC-0FE974289FD2_zpsbwcmuttz.jpg


E372B807-DD0A-474B-A030-134B56A5712B_zpsnekrtevy.jpg


C494D058-3FDC-4D24-96ED-202A3D5CF32B_zps026cdtcy.jpg


Sent from my iPhone using Tapatalk

i got the gatlin gun 2.0 square shrouds and they snap on. should i still epoxy them to keep them in place or you think it will be fine?
 

gigabit

New member
Joined
Oct 15, 2013
Messages
78
Reaction score
0
Location
Florida
i got the gatlin gun 2.0 square shrouds and they snap on. should i still epoxy them to keep them in place or you think it will be fine?


mine snaps in too and they sure are tighter than the concentric rings for the mh1.

imo its probably not entirely necessary but can be extra insurance


Sent from my iPhone using Tapatalk
 

smokinstroker

New member
Joined
May 25, 2011
Messages
3,405
Reaction score
0
Location
Texas
I feel like there is an enormous amount of research that has to go into this before pulling the trigger. It seems like it's not as simple as just click and order.

Looks great! If I had the time to sit down and look into all of this and piece it together I would love to tackle this one day.
 

gigabit

New member
Joined
Oct 15, 2013
Messages
78
Reaction score
0
Location
Florida
got my custom paint aerosol cans in and i'd have to say the quality their product is superb. to start off, i washed all the plastic with dawn/water and dried it. then i applied the adhesion promoter. i layered it very lightly on the separate bowls, but too heavy on the main plastic pieces and this will need to be redone. second step is a white sandable primer, which is specific for white pearl paint jobs. you have to let this one sit and dry about 30+ minutes before you sand it with 600 grit sand paper to remove the texture. i sanded tonight and pretty much stopped there on the actual pieces.

i did, however, apply 2 ground coats, 2 semi-wet pass with the midcoat, and 2 wet clear coat layers. i tried taking pictures to show the white tri-coat metallic paint and you can kind of get a glimpse of it. unfortunately, you can only appreciate it in real life and it's accuracy.

im too tired today and it's too late to apply the ground/mid coats to the actual pieces tonight. i hope to have the paint job done sometime early next week bc i work full time this weekend.

96515406-3FAB-4500-B6CA-29534F087B21_zpsabsd62kg.jpg


8E7C33A2-6CF7-4F86-A94B-6A898599B10E_zpsn6b4xcmu.jpg


5CCDB16A-D961-4333-8900-F3D96769FDED_zpsi4x3e0ok.jpg


5904E5D1-6781-40BF-A399-A6B3FA320E6F_zpsieozkuxq.jpg


86EB2BFA-CCA6-4D2B-B3A7-D16DBA87B91F_zpsx8z3vjcp.jpg
 
Last edited:

gigabit

New member
Joined
Oct 15, 2013
Messages
78
Reaction score
0
Location
Florida
update again. i finally had some free time to ground coat, pearl and gloss the main piece. i also primered, wet sanded the shrounds and sprayed matte black to them. the side marker required many more layers of ground to prevent orange shine through and that will be finished soon with all coats.

im going to let it cure overnight and then resemble on sunday for final alignment!

some pictures to enjoy...

EFAEB461-BC62-4D42-875F-FA228276560C_zpsypcyvcue.jpg


946F2F0C-C4A5-4BD1-A8FC-010BA17F335E_zpso5zvhv3v.jpg


17A734EE-4364-410A-8D4C-58A19EA58B5A_zpsoa2zb8qd.jpg


2EBB19E7-0C77-47E0-9077-5D0C4A65586D_zpsatsrivvp.jpg


023B17A3-0C2B-4CA4-8A01-EAF125650C0E_zpsewadkrvq.jpg


E62EECCF-387B-436D-AA69-454F4FA77763_zpsqoyc9rfo.jpg


638A217B-B1EF-4A96-93E4-F76817CEE14F_zpskprnysvy.jpg


ADC50271-B6DD-4854-A3B1-A03E4D4DF3F3_zpsayqsyvfn.jpg


8A340C10-CED4-4CE0-B371-89BC6468A787_zpsehi4vecf.jpg


8933C0C3-56E1-4D94-9859-AA14D9E70D44_zpsbzbyqmvo.jpg


Sent from my iPhone using Tapatalk
 

FaSSt9602

New member
Joined
Jul 27, 2011
Messages
605
Reaction score
0
Location
Gilbert, AZ
I like the look of that VHT flat. I have tried a few other "flat" products and I haven't been a fan. Might have to grab a can of that.
 

gigabit

New member
Joined
Oct 15, 2013
Messages
78
Reaction score
0
Location
Florida
im 90% done. i will reopen it to install the led turn signals and then wire up the halos behind the shrouds. im getting kind of lazy.

B30491DB-C9FC-4232-97E5-DCA86361CAE8_zpsr5pqjle3.jpg


92B866DA-7DBB-40DB-86B1-DE92989979F6_zps8cqyctyn.jpg


44FB6112-79EF-4EF5-9610-E2D16FD789BE_zpsobeyaxmn.jpg


26EC0F5A-3F2D-4BA5-A0BD-D6E5D4D01CAD_zps31oplci5.jpg


48B5187B-8C48-46B8-9EB4-9981BFA8EE05_zpsnhtkhk6f.jpg


004A7B04-8C49-4B11-8C56-B0A4CB9F87C7_zpsscux7wo2.jpg


7E194113-39B8-4579-BEC7-6FB79858F4D9_zpsnewoswq9.jpg


08DB0880-AD71-49D2-9801-4CA101C05F60_zpslojwn3xb.jpg


9E5F70D6-D768-4718-AFCB-0AFF48AF35DC_zpsmahqdkkb.jpg


Sent from my iPhone using Tapatalk
 

gigabit

New member
Joined
Oct 15, 2013
Messages
78
Reaction score
0
Location
Florida
some after thoughts...

1: its difficult to align the upper and lower projectors in the exact same direction with the H1's. if you plan on using the halos as drls, they are staggered. this is of course, if you use the screw to mount method. cutting a large hole and jb welding negates that.

2: i would probably install larger projectors next time, 3" or so.

3: i wouldn't install a dummy projector next time either. too much hassle with aiming. i like the look of a rigid d2 up there ;)

4: a metallic black background may be prettier

5: even if you color match it spot on, the clear case changes it to a darker tone, as seen in those pics. i dont think the color varies as much as the camera portrays, but it's still there.

ill add more thoughts once i think of them!

in the mean time here's an output shot!

BA9D5861-D7AF-46D0-A574-648D4F08BDF1_zpsd07vgluo.jpg


Sent from my iPhone using Tapatalk
 
Last edited:

gigabit

New member
Joined
Oct 15, 2013
Messages
78
Reaction score
0
Location
Florida
a few real world night shot on the road. i gave it a height of 39" at 25' but raised it to 41" due to low distance output. these pics are at 39" at 25'.

my next picture posts will be in 2 weeks or so as i will be moving. hopefully the Led bars will be badass.

i will also be reinstalling my PTM platinum grill. the previous one started chipping with regular clear. going to use a 2-part urethane this time.

7C9F42FB-28CA-41B0-BEEB-06C37D89C5AF_zpssc8bsjuc.jpg


8FA24DDD-A82F-431D-9FE1-C9DE85F9BDF6_zpsnigrpch5.jpg


8F88B3B5-2EE0-472C-8AF8-9F2D8E379ABE_zpsyevz003q.jpg


38E52BB0-80CD-412E-A905-C898C19E9F17_zps0g6vwe8r.jpg


3EE32D6B-35DE-49CE-AD27-2CCB9522B212_zpsctfwihyt.jpg
 

Cory@RPHC

New member
Joined
Oct 4, 2011
Messages
504
Reaction score
0
Great write up. Only thing I would have done differently was black turn signal reflectors to "pop". Still look great though
 

utlonghorns416

New member
Joined
May 18, 2011
Messages
126
Reaction score
0
Watch working with the oven cleaner, I used it once and it ate pits in the upper shroud.

Your progress looks great.
 

gigabit

New member
Joined
Oct 15, 2013
Messages
78
Reaction score
0
Location
Florida
Hey what kind of projectors are those n where did you get them from??


check out the retrofit source, they are the major player for all aftermarket projectors.

i'd bypass the morimoto H1 for the super duty and look at d2s or fxr.
 

infinitereality

New member
Joined
Mar 29, 2017
Messages
1
Reaction score
0
Location
Vinton, LA
Reviving this thread since I'm fixing to do a retrofit for a buddy and this will be invaluable. Thanks for taking the time to post it!
 

Latest posts

Members online

Top